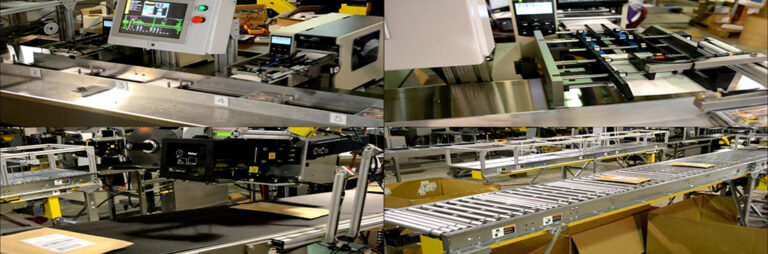
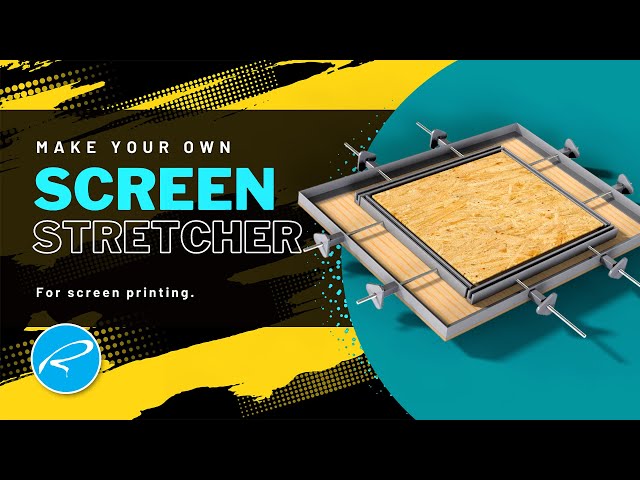
Cheap Screen Stretcher: The Ultimate 2025 Sourcing Guide
Introduction: Navigating the Global Market for Cheap Screen Stretcher
Global suppliers now make low-cost screen stretcher units widely available, but “cheap” that sacrifices quality adds re-tensioning, uneven mesh, and downtime. For USA and Europe buyers, the challenge is balancing cost with repeatability, compliance, and logistics.
This guide helps you source safely at lower price points:
– Differentiate screen printing stretchers from canvas stretchers to avoid mismatched tools.
– Vet suppliers for frame squareness tolerance, repeatability, and warranty length.
– Check electrical/mechanical compliance (CE for EU; UL/ETL where applicable).
– Model shipping costs, lead times, and import duties at different price points.
– Negotiate MOQs, packaging, and after-sales support to reduce total cost of ownership.
Typical price spectrum (Amazon examples)
| Product type | Example size | Listed price (USD) | Notes |
|—|—|—:|—|
| Screen printing stretcher (manual, 24″ x 24″) | 24″ x 24″ | $182.99–$228.00 | Manual units; lower prices may require stricter QC checks |
| Mobile screen magnifier (not for screen printing) | 10″–12″ | $21.88–$25.99 | For reference only; not a printing stretcher |
Key takeaway: Manual 24″ x 24″ units cluster near $200; if you see much lower, confirm structural rigidity, clamping repeatability, and returns policy. Use this guide to benchmark offers, negotiate MOQs, and secure compliant shipments to the USA and Europe.
Top 10 Cheap Screen Stretcher Manufacturers & Suppliers List
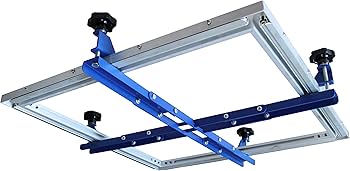
1. Anatol Pneumatic Screen Stretcher – Richardson Supply

Domain: richardsonsupply.com
Registered: 1997 (28 years)
Introduction: Easy to operate, Anatol’s Pneumatic Screen Stretcher delivers uniform high-tension screen stretching with almost any frame/mesh configuration….
2. Professional Screen Stretcher for Screen Printing – Anatol Equipment
Domain: anatol.com
Registered: 1998 (27 years)
Introduction: Anatol’s Screen Stretcher ensures uniform tension for screen printing. Easy-to-use, durable machine for all frame sizes. Shop now!…
3. Silkscreen Screen Stretcher | Newman Screen Printing Stretch Device
Domain: lawsonsp.com
Registered: 1996 (29 years)
Introduction: Out of stockThe Lawson Screen Stretching Machine simplifies the process of stretching your own screen printing mesh frames, making it efficient and user-friendly….
Illustrative Image (Source: Google Search)
4. Screen Stretching Machine – Products – FINECAUSE
Domain: finecause.com
Registered: 2012 (13 years)
Introduction: This is a screen stretching machine for high-quality printing.【Using for the silk screen stretching process, apply with high stretching tension request】….
5. Screen Stretcher – Dynamic Screen Printing Supply
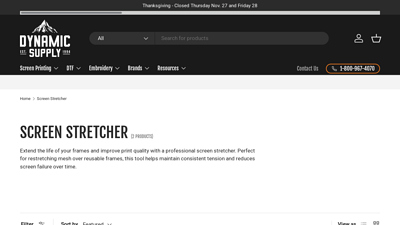
Domain: dynamicscreenprintingsupply.com
Registered: 2014 (11 years)
Introduction: Free delivery over $250 30-day returnsExtend the life of your frames and improve print quality with a professional screen stretcher. Perfect for restretching mesh over reusable frames, ……
6. RhinoStretch Hand Screen Stretcher – RhinoTech
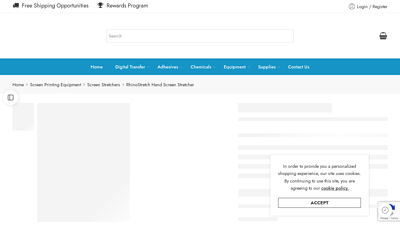
Domain: rhinotechinc.com
Registered: 1997 (28 years)
Introduction: In stock Free deliveryRhinoStretch Screen Stretcher RSP100 Series Manual Hand Stretcher has three sizes to produce 20′′ x 24′′, 23′′ x 31′′ and 25′′ x 36′′ screen frames….
7. manual screen stretching machine, DIY silkscreen stretcher …

Domain: doyanmachines.com
Registered: 2018 (7 years)
Introduction: Doyan screen printing is a supplier that Provides a manual screen stretching machine, DIY silkscreen stretcher, silkscreen stretcher; we are Provide prices, ……
Illustrative Image (Source: Google Search)
8. Pneumatic Screen Stretcher – Great Western Manufacturing
Domain: gwmfg.com
Registered: 1996 (29 years)
Introduction: A highly precise and powerful screen stretcher, the SEFAR® Pneumapp-2 Pneumatic Stretching System is a specially developed stretching system….
Understanding cheap screen stretcher Types and Variations
Understanding Cheap Screen Stretcher Types and Variations
Cheap screen stretchers vary widely across applications. For industrial screen printing, “screen stretcher” refers to mesh-tensioning equipment; in visual merchandising and retail, it can mean screen magnifiers for phones; for art, it covers canvas stretcher bars and pliers. The following overview and table help procurement teams classify options and match them to needs.

Illustrative Image (Source: Google Search)
Comparative overview
| Type | Features | Typical Applications | Pros | Cons |
|---|---|---|---|---|
| Manual screen printing mesh stretcher (24″×24″) | Manual clamping; precise alignment; 24″×24″ work area; hardware-cloth-compatible; spring-loaded staples; $182–$228 | Small-shop screen printing, artwork reproduction, short-run apparel and signage | Low capex; simple operation; reliable small-format tensioning | Limited format size; slower than electric/pneumatic; risk of uneven tension without method |
| Electric/pneumatic screen printing stretcher (industrial) | Motorized/pneumatic tensioning; programmable presets; fast cycling; robust frames | Medium to large print shops; high-volume apparel and packaging | Consistent tension and speed; reduced labor | Higher capex and maintenance; larger footprint; less “cheap” |
| Mobile phone screen magnifier (foldable or retro TV) | 10–12 in magnifier; 3D HD optics; foldable/retro styles; adjustable phone holder; $21.88–$25.99 | In-store demos, trade shows, POP displays, gift aisle | Low cost; instant perceived size increase; easy to ship/store | Optical distortion vs. direct screens; durability varies; non-industrial |
| Art canvas stretcher bars (wood frame) | Solid wood bars; common sizes (e.g., 16×20 in); knockdown or fixed joints | Studios, print-on-canvas, framing, DIY art | Affordable framing; readily available | Wood movement can warp frames; limited precision for tensioned mesh |
| Canvas/staple pliers for stretching | Stainless steel; spring return; 4–3/4″ wide grip; staple remover; $15–$17 | Art canvas stretching; installing fabric under tension | Low-cost tool; improves grip and speed | Not a stretcher; quality varies; hand fatigue over long runs |
Detailed breakdowns by type
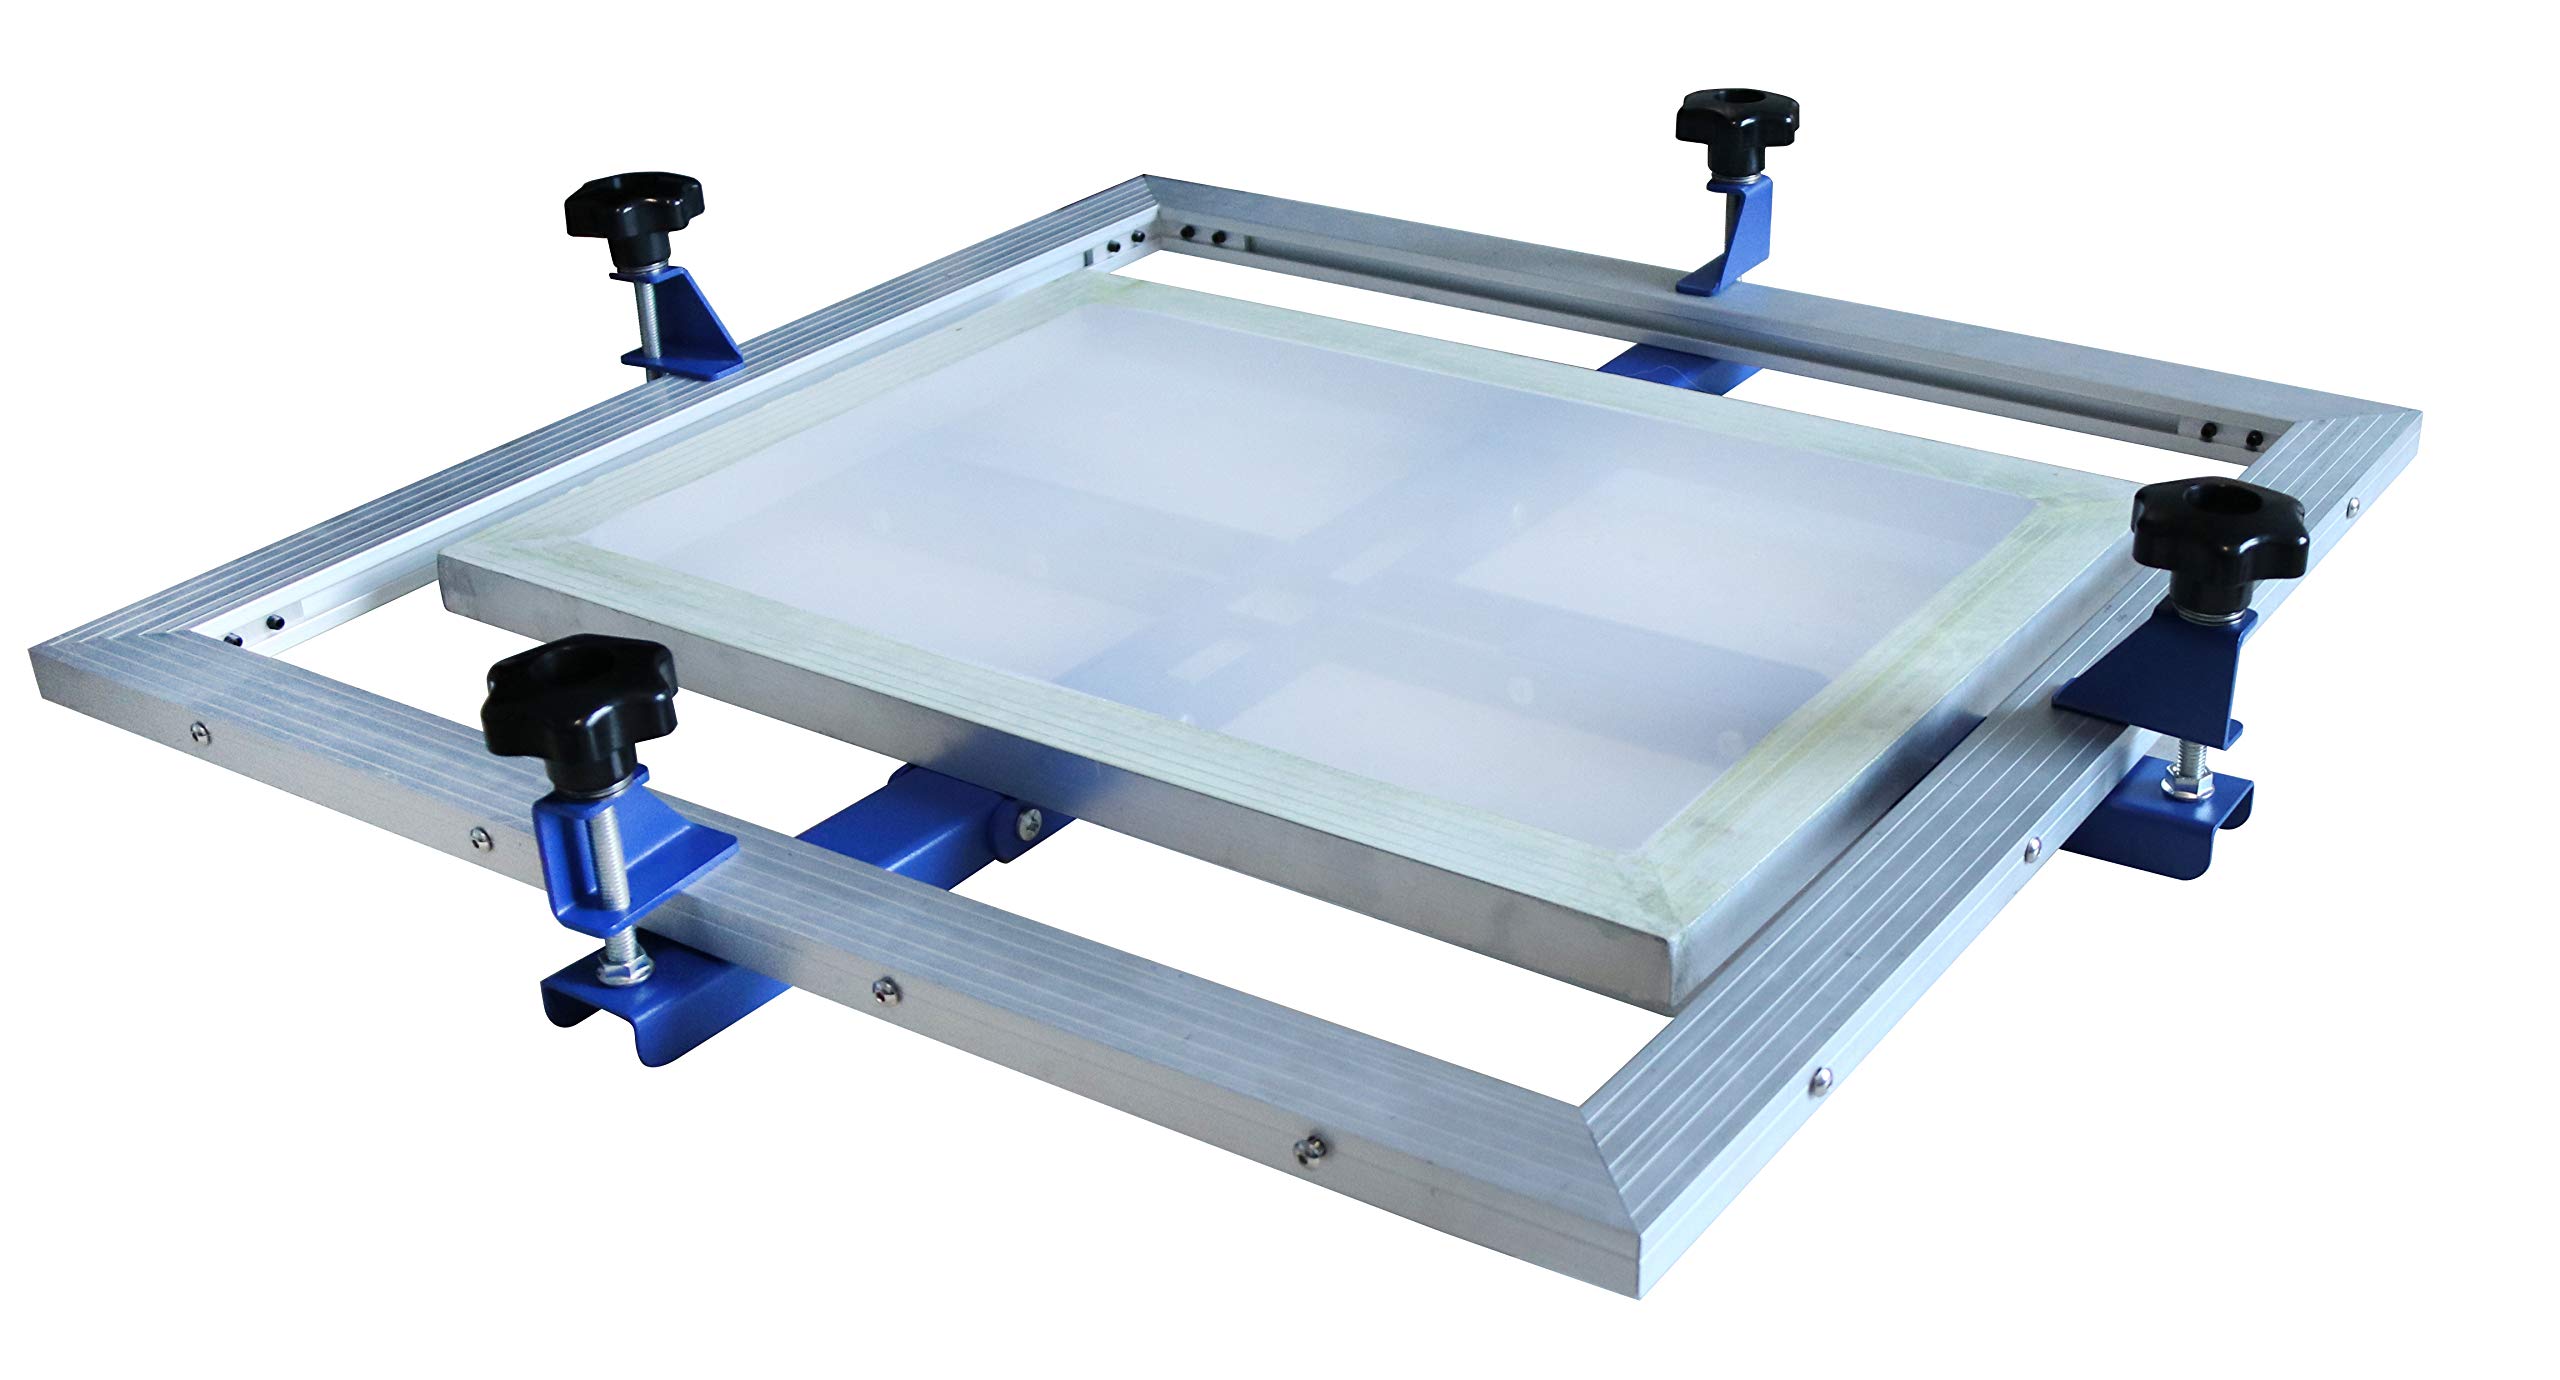
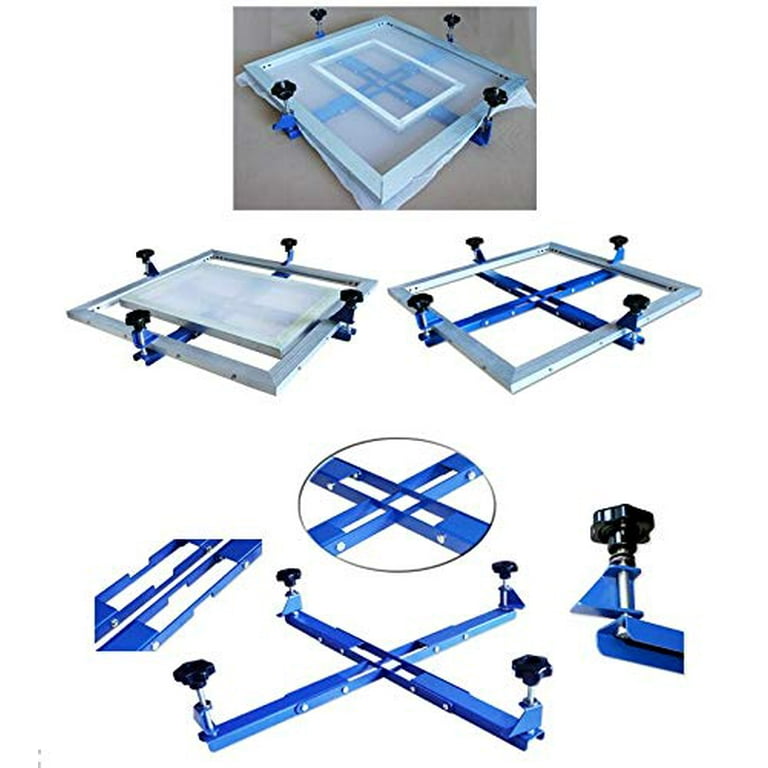
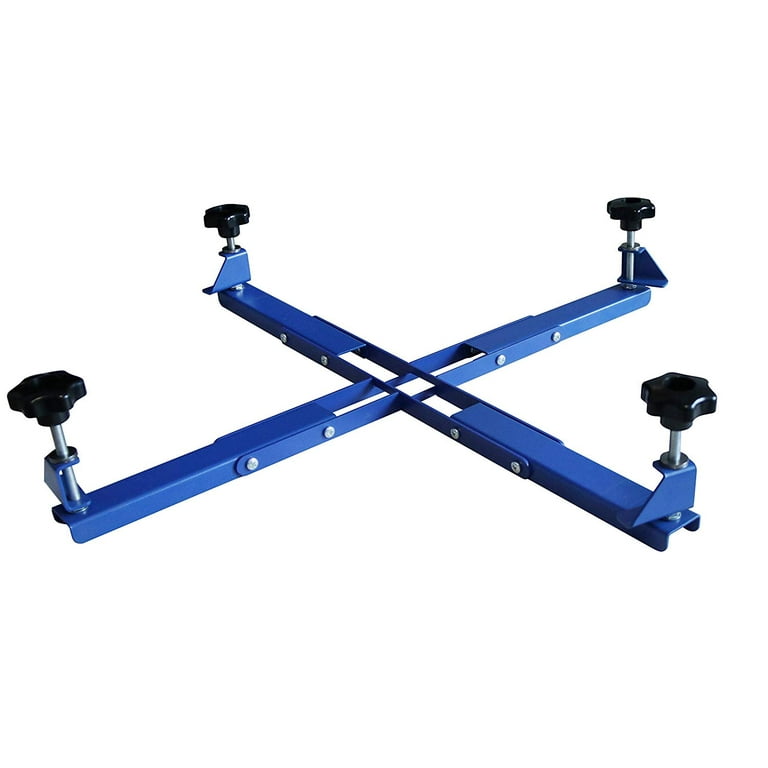
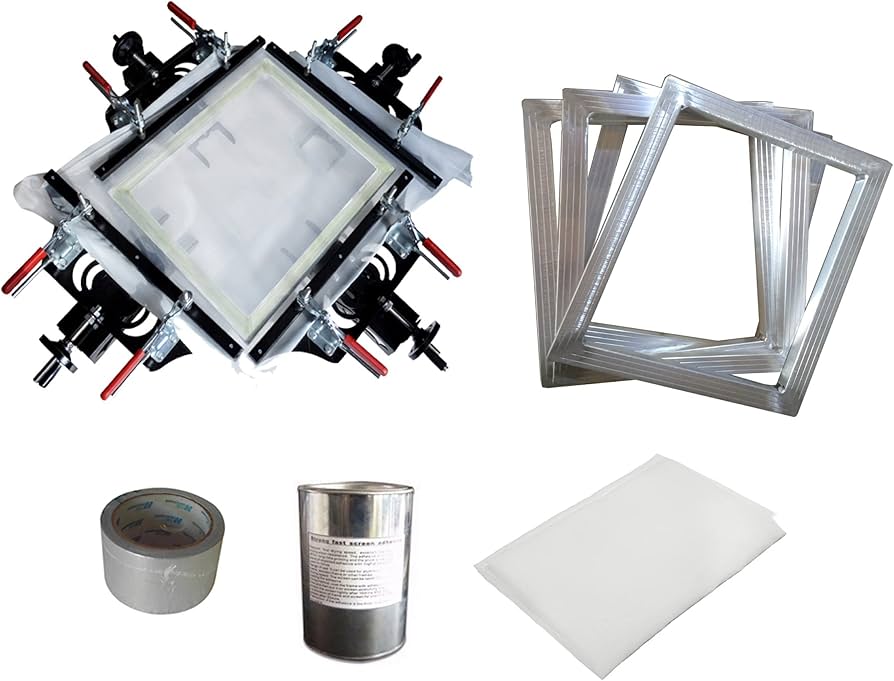
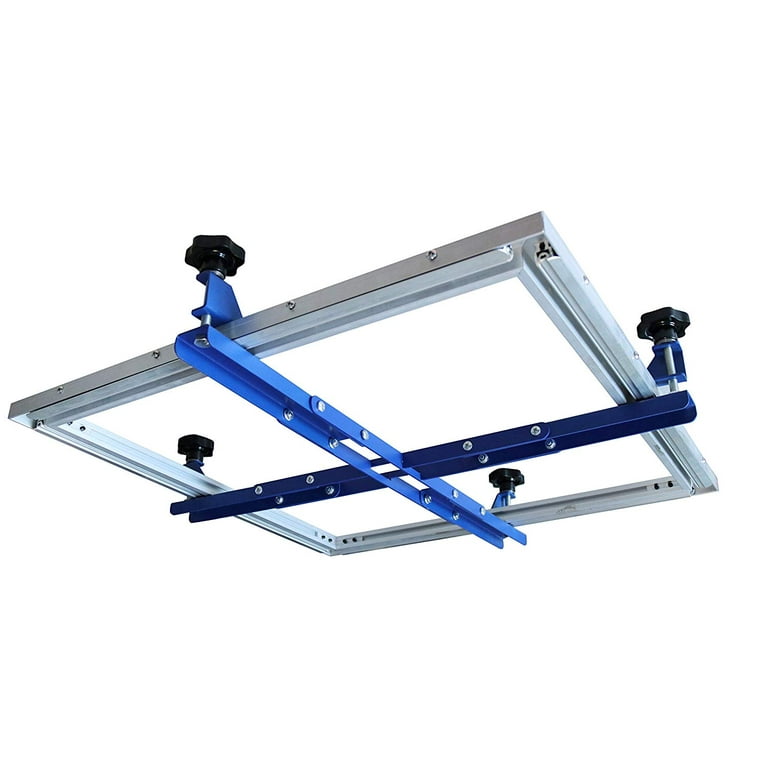
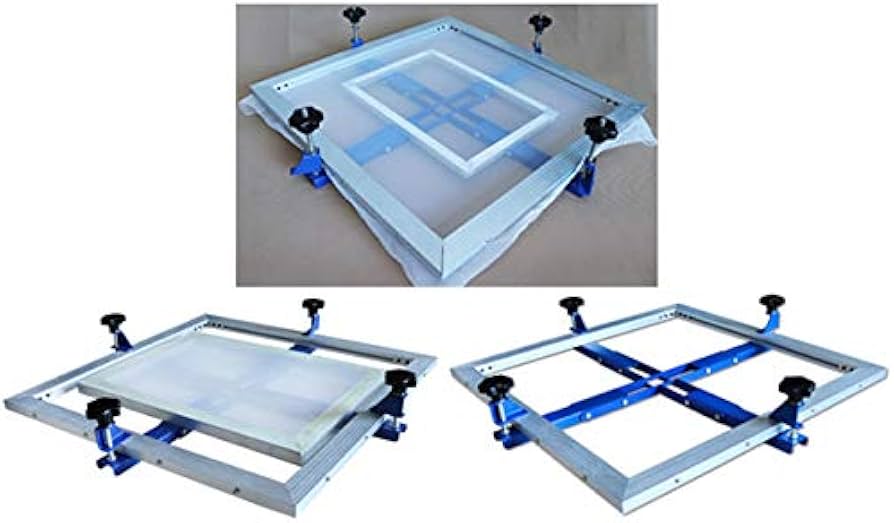
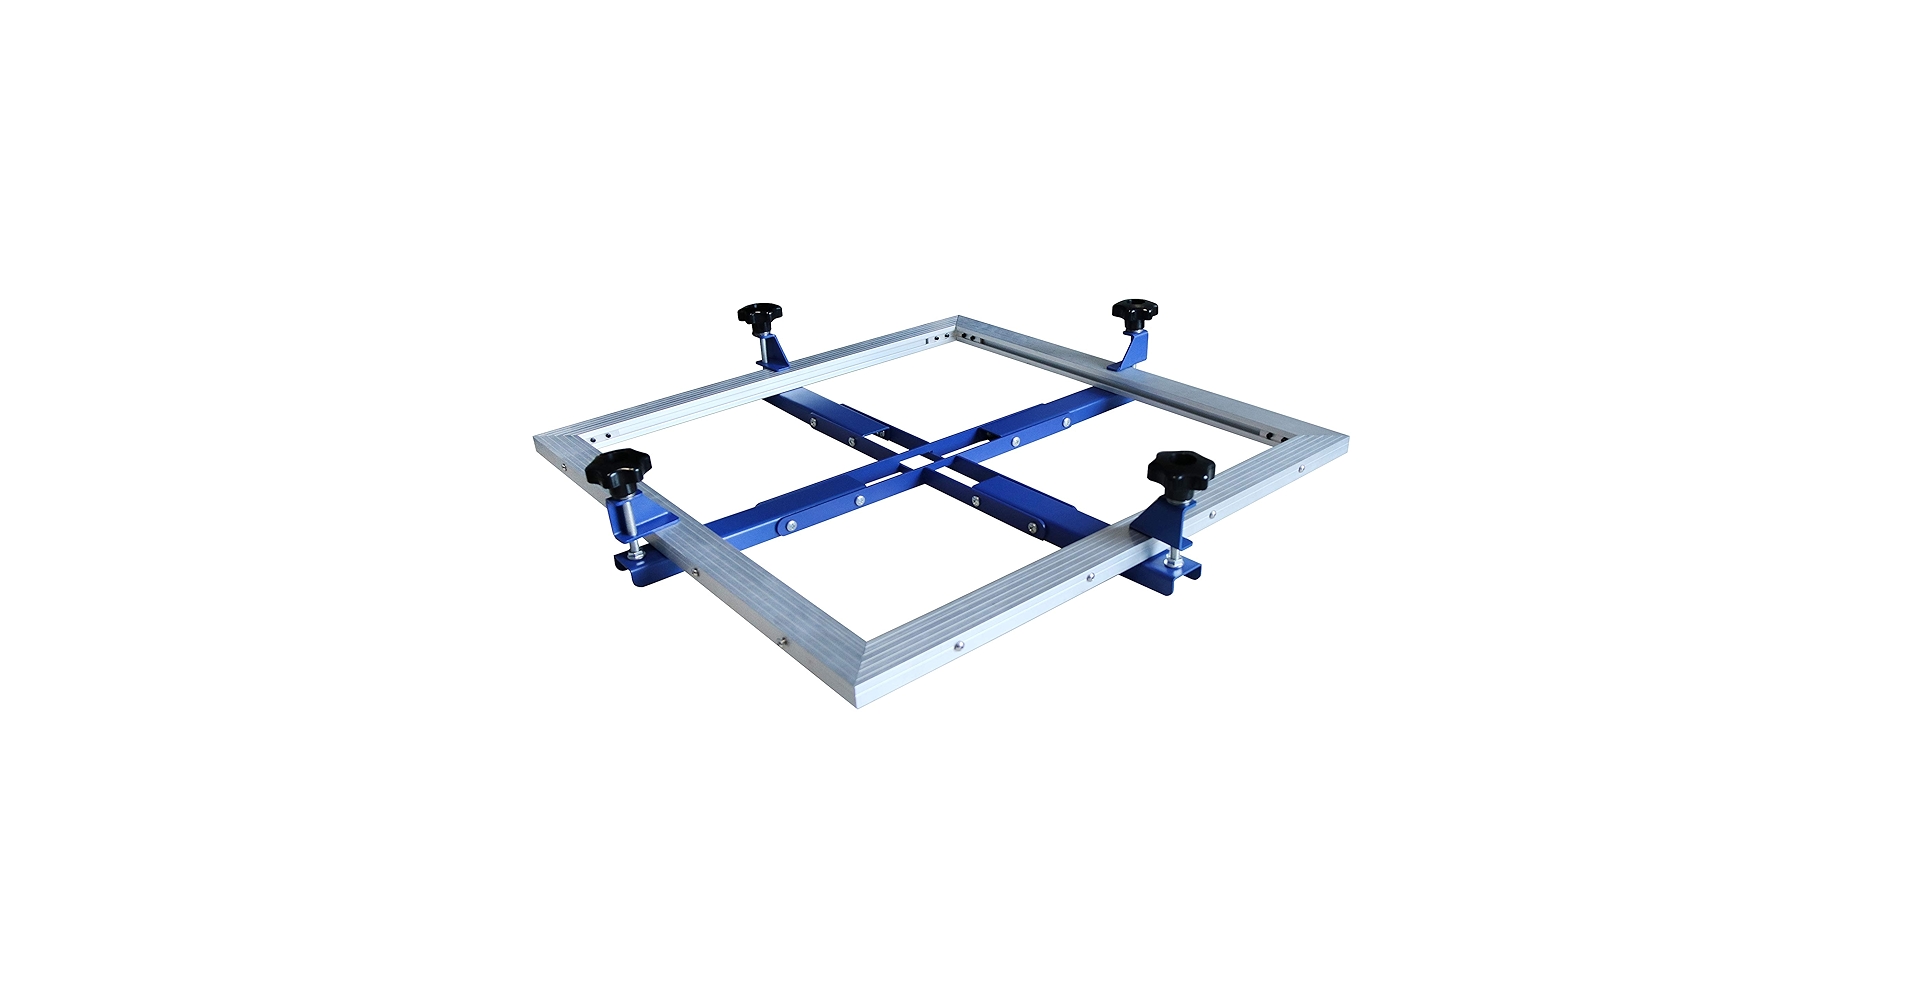
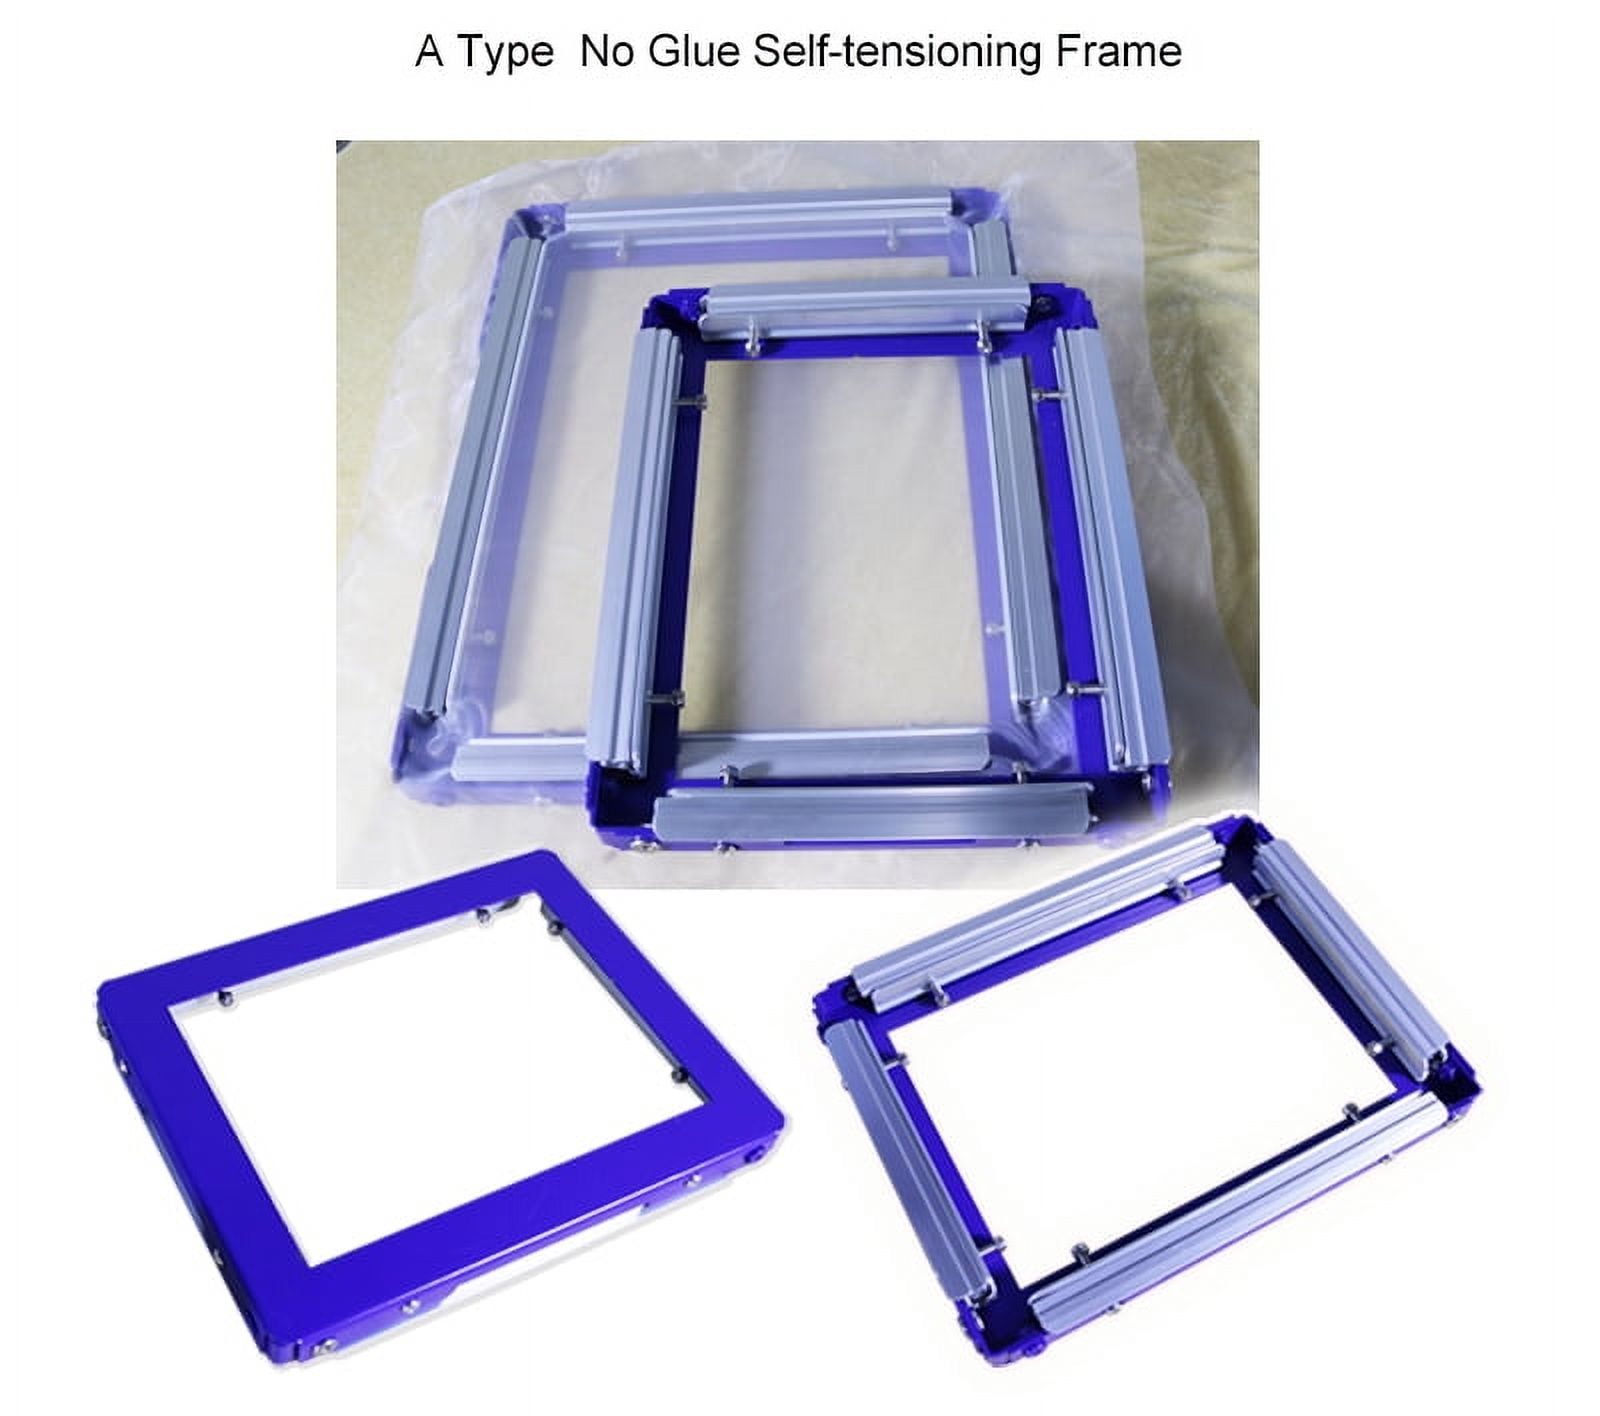
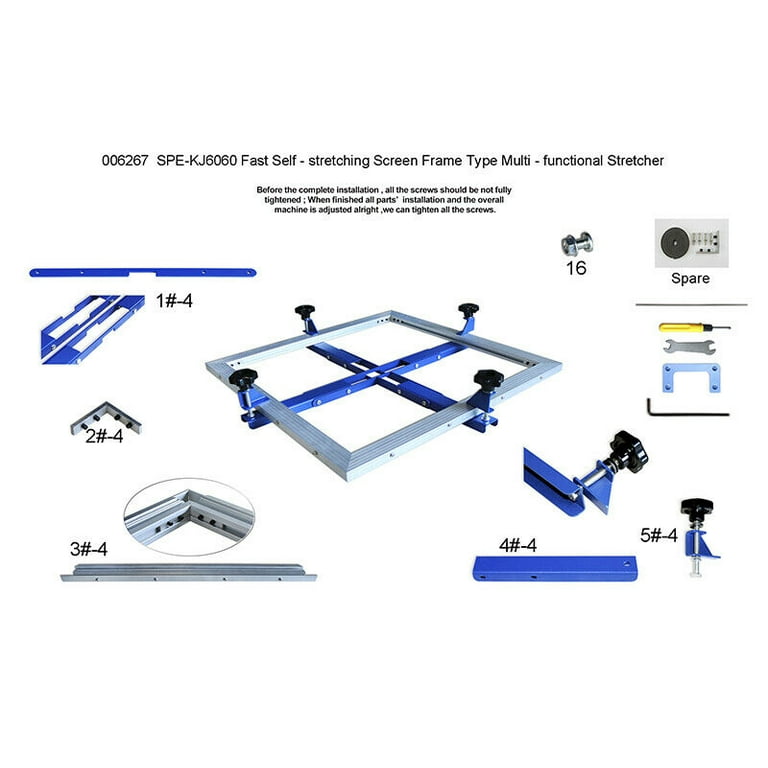
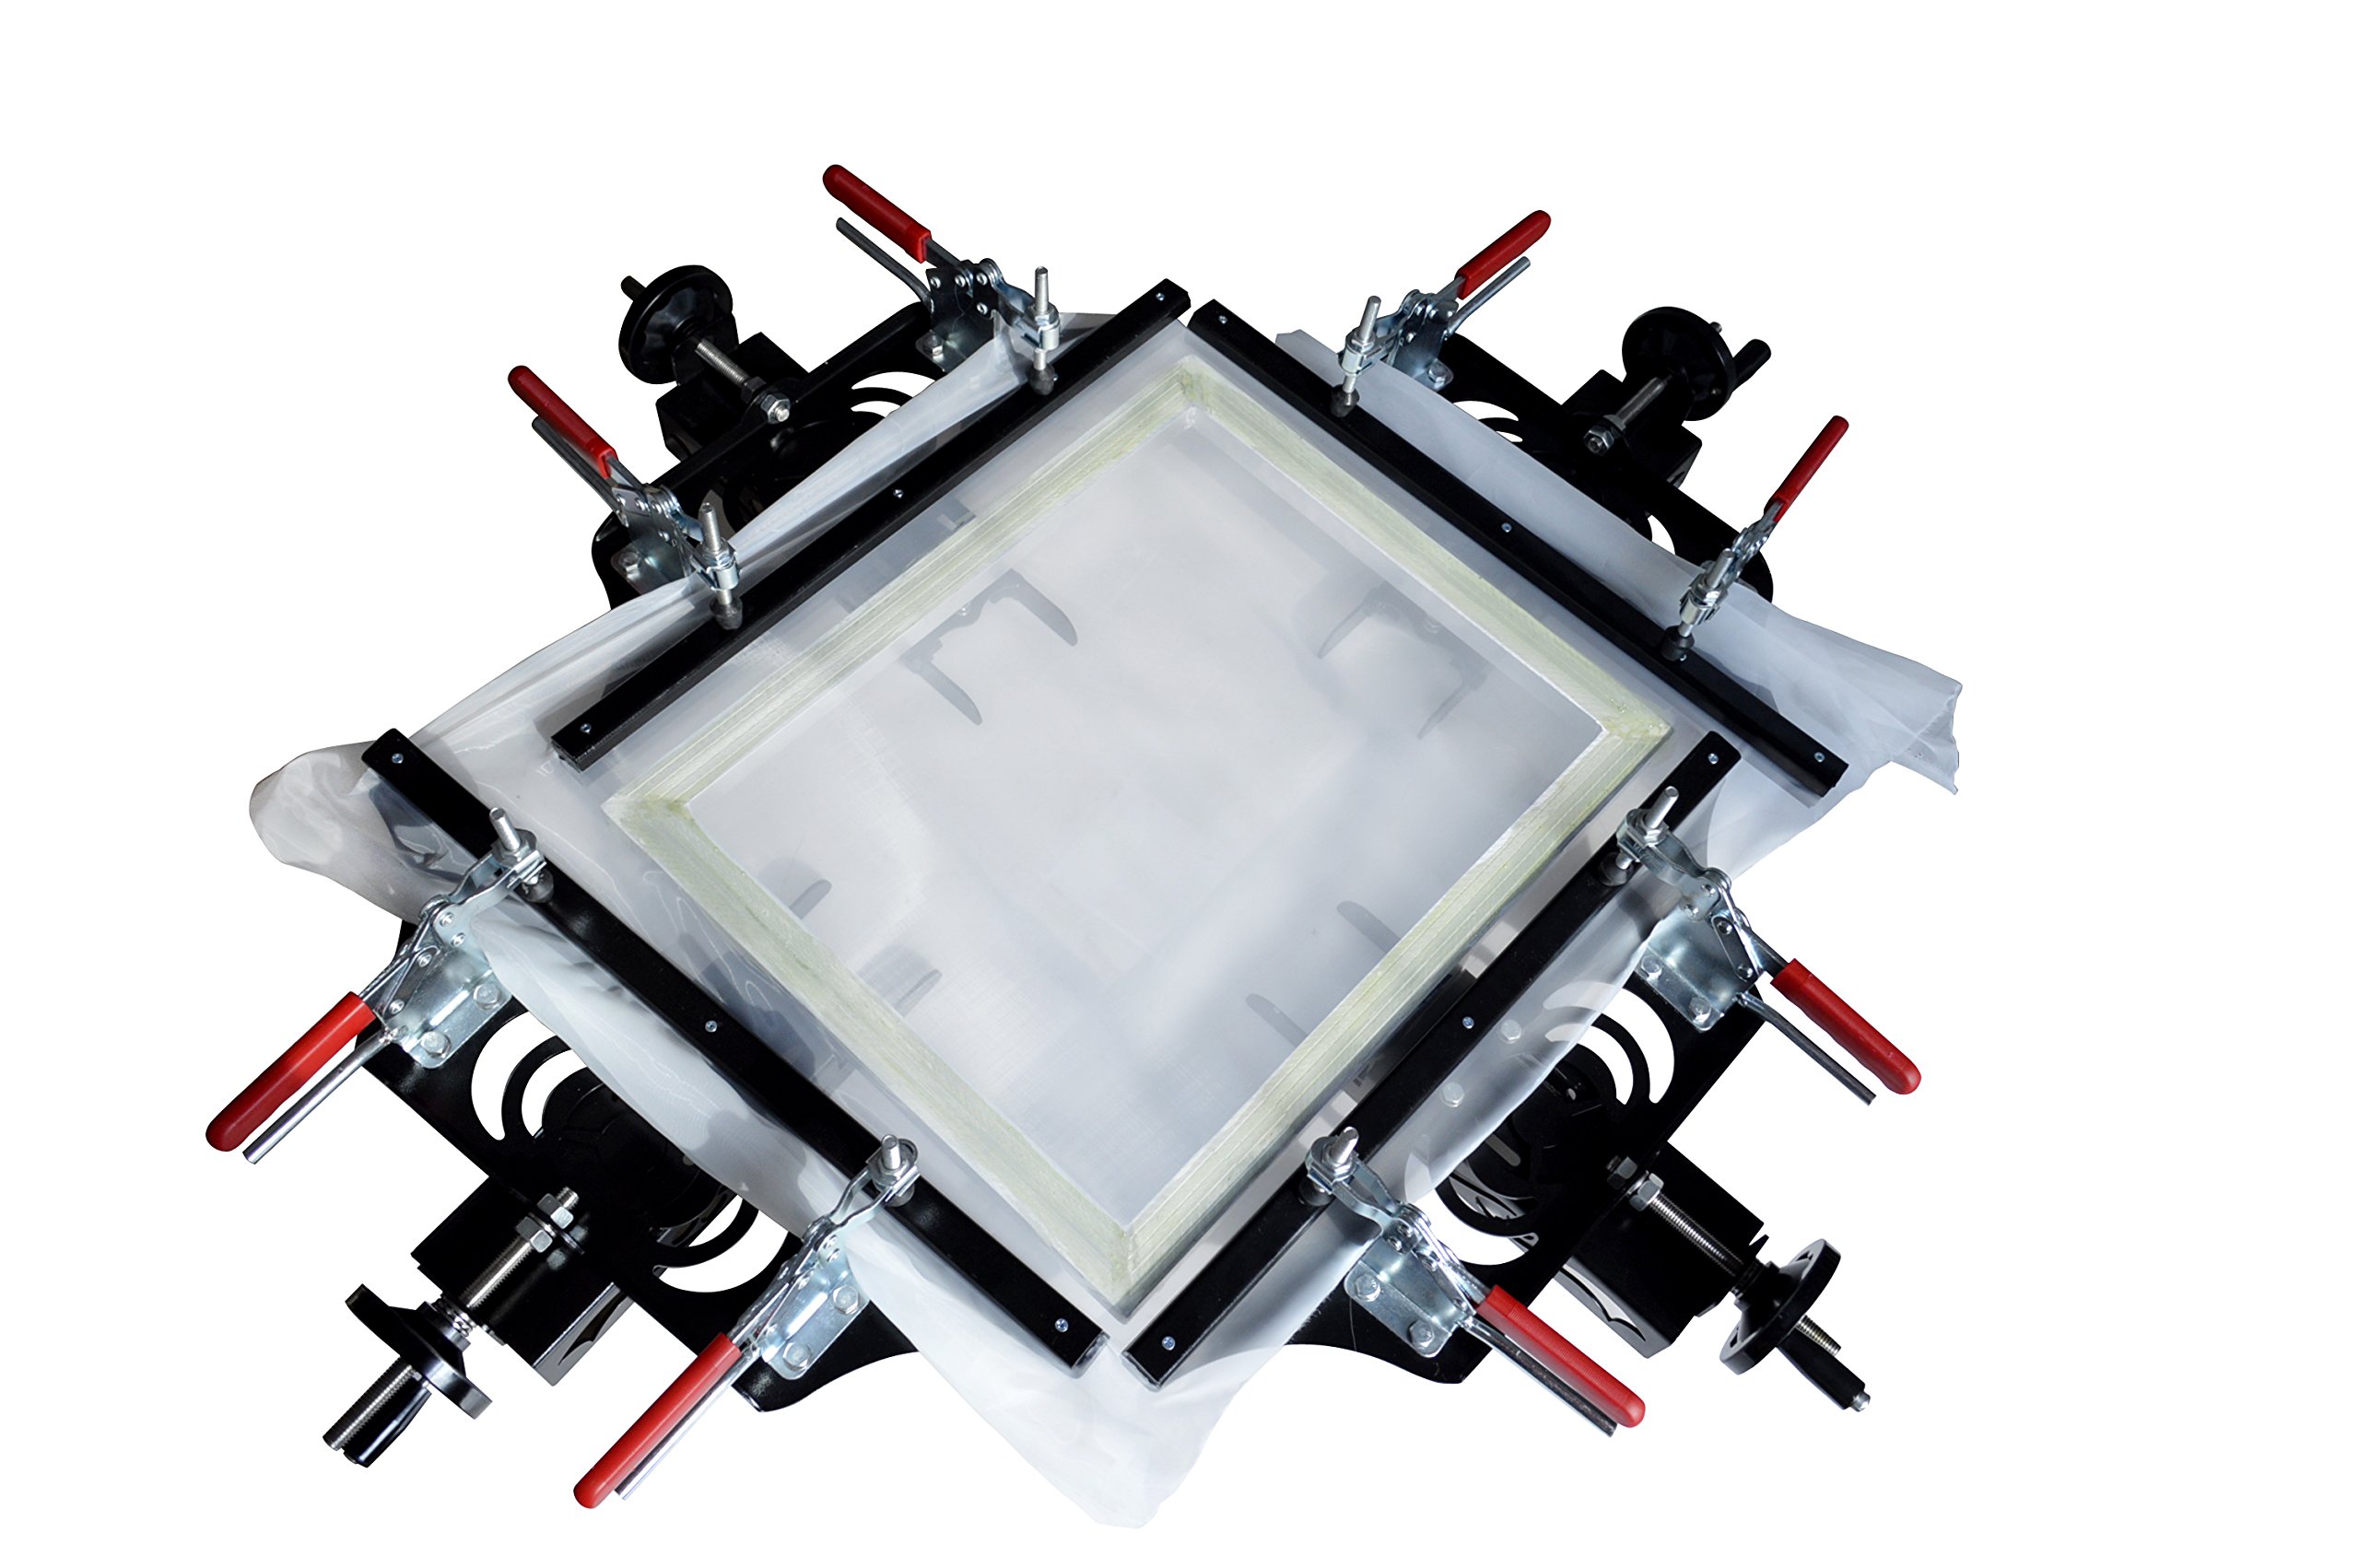
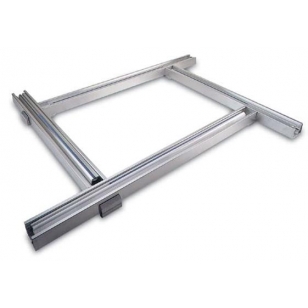
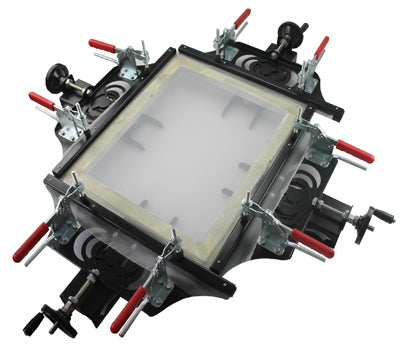
1) Manual Screen Printing Mesh Stretcher (24″×24″)
– What it is: A compact, bench-mounted frame with manual clamps used to tension screen printing mesh. Popular models (24″×24″) are priced around $182–$228 on platforms like Amazon, and are marketed as “high precise.”
– Key features:
– Manual operation with corner clamps and staple systems.
– Designed for hardware cloth and mesh alignment.
– 24″×24″ work area supports common small-format jobs.
– Applications:
– Small print shops for apparel, posters, and signage.
– Art reproduction studios needing consistent mesh tension.
– Pros:
– Low capital outlay and simple setup.
– Reliable for small to medium formats with repeatable method.
– Compact footprint fits limited shop space.
– Cons:
– Limited size; larger screens require different equipment.
– Consistent tension relies on operator technique.
– Slower than automated systems; potential staple pull-through if misused.
2) Electric/Pneumatic Screen Printing Stretcher (Industrial)
– What it is: Automated tensioning systems using electric motors or pneumatic cylinders to stretch mesh quickly and consistently.
– Key features:
– Programmable or adjustable tension setpoints.
– Faster cycle times compared to manual rigs.
– Robust frames and high clamping forces.
– Applications:
– Medium to large commercial print operations.
– High-volume apparel and packaging where repeatability matters.
– Pros:
– Consistent tension reduces registration issues and improve print quality.
– Reduced operator fatigue and labor time.
– Cons:
– Higher purchase and maintenance costs; less “cheap.”
– Larger footprint and energy/compressed air requirements.
– Overkill for small shops or low-volume runs.
3) Mobile Phone Screen Magnifier (Foldable or Retro TV)
– What it is: Low-cost visual accessories that magnify a phone’s display using a Fresnel or 3D HD lens. Typical pricing is $21.88–$25.99 on marketplaces, with foldable and “retro TV” styles common.
– Key features:
– 10–12 in viewing area with adjustable phone holder.
– Lightweight plastic construction; foldable designs for portability.
– Simple assembly; no power needed.
– Applications:
– Retail and POP displays for impulse buyers.
– Trade show demos and point-of-purchase marketing.
– Gift/gadget categories and online video placements.
– Pros:
– Very low unit cost; easy to ship and distribute.
– Immediate perceived value for phone-based content.
– Cons:
– Optics can introduce distortion or glare.
– Limited durability; lenses may scratch; plastics can crack with use.
– Not intended for industrial screen printing.
4) Art Canvas Stretcher Bars (Wood Frames)
– What it is: Wooden bars forming frames to mount canvas for artwork or print-on-canvas. Common sizes (e.g., 16×20 in) are widely available and inexpensive.
– Key features:
– Solid wood construction; various joint styles.
– Standard art sizes; knockdown assemblies available.
– Applications:
– Fine art studios, canvas printing, framing shops.
– DIY and education environments.
– Pros:
– Affordable framing for canvas art; readily stocked.
– Simple installation with canvas pliers and staples.
– Cons:
– Wood can warp or move with humidity changes.
– Less suited to tensioned mesh for screen printing.
– Precision depends on bar quality and assembly.
Illustrative Image (Source: Google Search)
5) Canvas/Stretching Pliers (Tooling)
– What it is: Pliers designed to grip and pull fabric or canvas while stapling to a frame; often paired with a staple remover. Priced around $15–$17 on retail platforms.
– Key features:
– Stainless steel construction; spring return handles.
– Wide grip surfaces (e.g., 4–3/4″) for better leverage.
– Applications:
– Stretching canvas for art and upholstery.
– Installing mesh or fabric under tension on frames.
– Pros:
– Low-cost accessory that improves speed and control.
– Reduces hand strain during repetitive stretching.
– Cons:
– Not a stretcher unit; depends on frame and technique.
– Tool quality affects durability and performance.
Selection guidance for “cheap” use cases
- Short-run screen printing: manual 24″×24″ stretchers deliver low capex with acceptable repeatability when methodized.
- Demo and merchandising: phone magnifiers are inexpensive, portable, and effective for in-store engagement.
- Art and canvas: wood stretcher bars plus canvas pliers cover basic framing needs at low cost.
- Scale-up needs: electric/pneumatic units justify investment only when throughput and quality consistency justify higher capex and maintenance.
Use this typology to align budget, application, and operational requirements before purchasing.
Key Industrial Applications of cheap screen stretcher
Key Industrial Applications of Cheap Screen Stretcher
| Industry/Application | Detailed Benefits |
|---|---|
| Apparel & Promotional Printing | Quickly tension mesh for T‑shirts, teamwear, and merchandise. Cheaper stretcher cuts setup cost per job and reduces scrap from uneven tension; easy to justify at $182–$228 for mid‑volume runs. |
| Signage & Graphics | Prepare smaller format signs, decals, and posters; maintain consistent mesh flatness for cleaner ink release and better detail in text and line work. |
| Safety & Compliance Signage | Achieve repeatable, even tension to reduce pinholes, halos, and pin‑crimp defects that cause registration loss; supports consistent print uniformity across small runs. |
| POP & Display Graphics | Build branded point‑of‑purchase pieces, shelf talkers, and counter displays; faster changeovers and lower unit setup cost aid short runs and frequent revisions. |
| Industrial Marking & Labeling | Tension specialty meshes for codes, labels, and component marking where repeatable mesh geometry matters more than large format. |
| Prototyping & Sampling | Low‑capex way to test designs, mesh counts, and inks before scaling to larger equipment; ideal for agencies and in‑house print labs. |
| Education & Training | Safe, hands‑on tool for vocational programs and onboarding; minimizes investment while teaching proper stretching and screen prep techniques. |
| Small Business Start‑ups | Enables entry into screen printing with controlled budget; supports quoting feasibility for small jobs without committing to high‑cost equipment. |
| Repair & Maintenance | Re‑stretch damaged mesh on used frames; reduce waste by salvaging frames rather than discarding or replacing. |
| Contract & Print‑on‑Demand | Manage flexible demand by adding frame capacity cheaply; keep job scheduling responsive without tying up capital in premium fixtures. |
Note: Typical value range for manual 24″ x 24″ units on mainstream marketplaces is ~$182–$228 plus modest freight. Accessories such as canvas pliers and staple removers (~$15–$17) complement manual stretching workflows.
3 Common User Pain Points for ‘cheap screen stretcher’ & Their Solutions
3 Common User Pain Points for “Cheap Screen Stretcher” & Their Solutions
1) Low, uneven screen tension and mesh drift
- Problem: Tension varies across the frame; mesh moves during squeegee strokes; prints are blurry or out of register.
- Root cause: Budget stretchers use single‑locking corners and narrow contact area; hand stapling stretches corners more than the center; no reference grid.
- Solutions
- Install/upgrade to double‑locking corners with wider jaw contact (more contact area = more stable hold).
- Pre‑stretch mesh with a hand‑ratchet or windlass system; taping with high‑tack and back‑rolling improves grip.
- Use a tension meter and a simple crosshair/edge reference to check uniformity; re‑tension after the first 15–30 minutes to account for initial relaxation.
- Quick wins (low cost)
- Keep tensioning corners in a balanced order (opposite pairs).
- Apply a thin, uniform tape coat and press down firmly to reduce slippage at edges.
- Maintain consistent staple/spline depth across the frame; avoid over‑driving staples on one side.
2) Frame warping, poor registration, and rework
- Problem: Frames bow, diagonals don’t match, prints shift between setups; downtime to re‑square or remake screens.
- Root cause: Light‑duty aluminum or thin steel frames with single‑point clamping flex under load; no hard reference for diagonal length.
- Solutions
- Upgrade to rigid steel frames with corner keys and diagonal braces where possible; use double‑locking corners across the entire perimeter.
- Add a low‑cost alignment jig with hard stops for two diagonals; record both diagonal lengths to achieve repeatable squareness.
- Pre‑stretch mesh with consistent pull pattern; let the assembly “settle” for 10–15 minutes before final check.
- Quick wins (low cost)
- Square the frame before mounting the mesh; confirm both diagonals are within ±1–2 mm before stapling.
- Maintain mesh height with foam spacing or off‑contact blocks to reduce bending forces during print.
- Keep frames dry and stored flat to avoid moisture or heat warping over time.
3) Slow throughput and variable quality across operators
- Problem: Re‑stretching, re‑registration, and waste add up; lead times slip; job cost inflates with rework.
- Root cause: Manual processes with no fixtures; different operators tension and square frames differently; no documented tolerances.
- Quick wins (low cost)
- Use alignment jigs, staple guns, and spline rollers to standardize setup steps; keep the same tensioning sequence across jobs.
- Pre‑cut mesh panels and set up low‑mix kits for common frame sizes; store staple/spline and tape in labeled bins to reduce search time.
- Create a one‑page SOP with reference numbers and tolerances (e.g., target tension, diagonal range, staple spacing).
- Optional upgrades
- Upgrade to 24″ x 24″ manual screen stretching machine (≈ $183–$228) to improve repeatable tension; ensure the unit supports stable corners and reliable clamping.
- Switch to steel frames with robust double‑locking corners if you’re still using light aluminum and frequent rework.
Strategic Material Selection Guide for cheap screen stretcher
Strategic Material Selection Guide for Cheap Screen Stretcher
“Cheap” in a B2B context means lowest total cost of ownership (TCO) at acceptable performance for the intended use: basic photo/screen printing frames, temporary installations, art students, or disposable projects. The goal is to select materials that deliver acceptable stiffness, assembly speed, and durability at the lowest unit cost and simplest supply chain.
Illustrative Image (Source: Google Search)
How to define “good enough”
- Frame stiffness sufficient to keep the mesh taut during printing—minimal bowing and twisting.
- Acceptable lifecycle for the price band: weeks to months (not years).
- Corrosion resistance to avoid rust or swelling in humid environments.
- Simple assembly: screwdriver, staples, or basic clips; minimal special tooling.
- Supply chain readiness: standardized sizes, common hardware, and quick replacement parts.
Core criteria to prioritize
- Stiffness-to-weight: stiffer frames reduce mesh sag; lighter frames reduce shipping and user fatigue.
- Corrosion and moisture tolerance: essential in humid climates and for inks/solvents.
- Assembly complexity: speed matters for throughput (students, small shops).
- Cost band: maximize value while meeting minimum performance.
Common frame materials for cheap stretchers
- Aluminum extrusion (6061/6063)
- Pros: light, corrosion-resistant, easy to cut and machine, good stiffness in larger extrusions.
- Cons: higher unit cost than steel; thinner walls can flex if over-span; not ideal for heavy dynamic loading.
-
Best for: long, thin frames; frequent reassembly; humid or outdoor use.
-
Galvanized carbon steel tube/angle
- Pros: very stiff, lowest material price, common in hardware stores; excellent for large spans.
- Cons: heavier; zinc coating can chip; rust risk if scratched; edges can be sharp.
-
Best for: budget indoor frames with infrequent moves; use galvanized screws/hardware; touch-up zinc paint on cut edges.
-
Welded carbon steel (painted/galvanized)
- Pros: very rigid with fewer joints; durable against bumps; low TCO for high-usage, low-cost use.
- Cons: heavier; welding adds labor; shipping cost rises; finish can chip without care.
-
Best for: permanent or semi-permanent cheap frames; large-format; minimal assembly time.
-
Stainless steel (304/316)
- Pros: corrosion-resistant, cleanable, long-lived; good for harsh or chemical environments.
- Cons: higher material cost; lower availability for generic frames; requires proper fasteners.
-
Best for: wet process zones, educational labs, humid climates where longevity is needed despite cheap design intent.
-
PVC/ABS plastic profiles
- Pros: inexpensive, lightweight, corrosion-free, easy to cut; safe around solvents.
- Cons: lower stiffness, creep under constant load; UV exposure can embrittle; limited size range.
-
Best for: small-format, short-term use, photo enlargement frames; avoid high-span applications.
-
Solid wood (softwoods)
- Pros: low cost; easy to staple; readily available.
- Cons: moisture sensitivity; warping; requires frequent retensioning; corners can loosen over time.
- Best for: educational or hobby contexts with periodic re-stapling; small spans.
Joining and clamping methods that drive cost down
- Mechanical fasteners
- Corner brackets (zinc/steel), machine screws, and knock-down fittings are cheap and fast.
-
Use galvanized screws and washers to prevent corrosion; add Loc-tite or lock washers for vibration.
-
Staples/clips
- Staples and aluminum/steel clips secure mesh on wooden or metal frames; minimal tooling.
-
Ensure staple length and anvil are matched to frame thickness to avoid pull-through.
-
Adhesives
- Rubber-based or hot-melt adhesives can reduce assembly time and hide cut edges.
- Consider exposure to inks/solvents; test for outgassing and bond creep over time.
Mesh materials and trade-offs
- Polyester mesh
- Standard for screen printing; good strength and ink release; stable in water-based inks.
- Nylon mesh
- Slightly softer; good for water-based applications; can swell in humidity; less common in high-end print.
- Open-weave fabric (for photo enlargers)
- Simple to tension; lower durability; adequate for decorative and temporary screens.
Mesh selection primarily depends on your process (water- vs solvent-based inks) and desired durability. Keep the mesh simple (standard counts) to control cost.
Surface and edge finishes that reduce cost
- Aluminum: mill finish (no coating) is usually sufficient for cheap frames; anodize only if corrosion is critical.
- Steel: prioritize galvanized coatings; for cut edges, apply zinc-rich primer or touch-up paint.
- Plastic: UV-stabilized profiles only; avoid opaque colors that trap heat and increase creep.
Regional notes (USA, Europe)
- Availability
- USA: galvanized steel tube and aluminum extrusion are widely stocked; stainless for specialty needs.
- Europe: galvanized steel, aluminum profiles, and stainless remain common; verify EN standards for screws and fasteners.
- Regulatory and safety
- Follow local waste handling for metal and plastics; avoid treated wood with hazardous preservatives if used for frames.
- Procurement tips
- Buy standard lengths (e.g., 8 ft/2.4 m) to minimize cutting waste.
- Use domestically sourced hardware (screws, brackets) to simplify compliance and reduce shipping lead times.
Decision criteria by scenario
- Ultra-low-cost, frequent reassembly: aluminum extrusion with staples/clips; galvanized steel corner brackets; polyester mesh.
- High stiffness at minimal cost: welded galvanized steel frame; simple brackets; minimal finishing.
- Humid environments/education labs: stainless or well-galvanized frames; PVC/ABS for small formats; ensure adequate ventilation to minimize condensation.
- Short-term exhibition/photo: PVC/ABS frames or solid wood; staples/clips; open-weave fabric if acceptable.
Final selection checklist
- Confirm frame stiffness meets span; test with mesh installed.
- Ensure corrosion protection matches environment and cleaning chemicals.
- Standardize hardware across sizes to avoid SKU proliferation.
- Prefer simple assembly with off-the-shelf fasteners and staples.
- Validate mesh compatibility with your inks and cleaning agents.
Quick comparison table
| Material | Pros | Cons | Best Use Cases | Cost Band |
|---|---|---|---|---|
| Aluminum extrusion (6061/6063) | Light, corrosion-resistant, easy to cut, good stiffness | Higher price vs steel; can flex if thin; needs proper brackets | Humid environments; frequent moves; long spans | Medium |
| Galvanized carbon steel (tube/angle) | Very stiff, lowest cost, common hardware | Heavy; zinc can chip; rust risk on cuts | Budget indoor frames; large spans; minimal moves | Low |
| Welded carbon steel (painted/galvanized) | Very rigid; durable; fewer joints | Heavy; welding adds labor; shipping cost | Permanent/semi-permanent cheap frames; high-usage shops | Low–Medium |
| Stainless steel (304/316) | Corrosion-resistant; cleanable | Higher cost; availability varies | Harsh/humid or lab settings; long-term cheap frames | Medium–High |
| PVC/ABS plastic profiles | Inexpensive; lightweight; corrosion-free | Lower stiffness; UV creep; limited sizes | Small-format, short-term screens; photo enlargers | Low |
| Solid wood (softwood) | Cheap; easy to staple | Moisture-sensitive; warping; needs retension | Educational/hobby; small spans | Low |
Prioritize materials that meet minimum stiffness and corrosion requirements at the lowest complexity and cost. For most “cheap” applications in the USA and Europe, aluminum extrusion with galvanized steel hardware or galvanized steel tube with simple brackets will deliver the best combination of price, stiffness, and availability.
Illustrative Image (Source: Google Search)
In-depth Look: Manufacturing Processes and Quality Assurance for cheap screen stretcher
In‑depth Look: Manufacturing Processes and Quality Assurance for Cheap Screen Stretcher
Audience: USA, Europe
Scope: 24″×24″ to 48″×48″ manual, fixed‑frame screen‑printing stretchers (budget to mid‑range)
Materials & cost drivers
- Frames:
- Extruded aluminum: lighter, more corrosion‑resistant; higher material cost.
- Welded mild‑steel box tube: lower cost; requires anti‑corrosion coating.
- Cast zinc: good stiffness/weight at moderate cost; suitable for 24″ frames.
- Clamp hardware:
- Steel clamp bar with locking cam/lever and friction pad (rubber/EPDM).
- Zinc die‑cast cam blocks reduce cost; stainless springs for durability.
- Hardware: zinc‑plated steel rivets, nuts, bolts; optional stainless steel pin/hub.
- Coatings:
- Electrostatic powder coat (thermoplastic polyester), 60–80 μm typical for steel.
- Clear anodize (Type II) or hardcoat (Type III) for aluminum.
- Pads/clamps: textured EPDM or polyurethane (PU) pads; bonded with PU contact adhesive.
- Packaging: corrugated inserts, foam corners, instruction sheet, safety labels.
Core manufacturing steps
| Step | Purpose | Key operations | Cost‑optimization levers | Equipment |
|---|---|---|---|---|
| Material prep | Validate material grade/size and surface condition | Receiving inspection; cutting to length; deburr; inspect square | Standardize tube profiles; reduce custom extrusions; minimize SKUs | Saw (aluminum/steel); deburring tool |
| Forming/fabrication | Achieve frame geometry and stiffness | CNC cutting, end‑milling, drilling; welding (steel); corner key machining; chamfer edges | Use permanent jig for repeatable alignment; batch drilling; reduce weld passes on steel | CNC router/mill; MIG/TIG welder; jigs/fixtures |
| Surface treatment | Corrosion resistance and finish | Sandblasting (steel); phosphate; powder coat or aluminum anodize | Choose powder coat for steel; hardcoat only if required; minimize masking | Sandblast cabinet; spray booth; oven; anodizing bath (if applicable) |
| Clamping assembly | Install clamp hardware and tensioning | Mill slots/holes; assemble cam, springs, pivots; rivet/bolt bars; attach pads | Use zinc die‑cast cam blocks; standard pad thickness; pre‑assembly kits | Assembly fixtures; torque tools |
| Final assembly | Integrate sub‑assemblies into frame | Align frame with jig; torque fasteners; verify mesh attachment points | Use single torque spec per size class; common tooling across sizes | Torque screwdriver; clamps; dial indicators |
| Inspection/QC | Confirm function and safety | Geometry check; torque verification; clamp cyclic test; shipping drop test | Sample‑based tests on budget lines; retain pilot lot 100% inspection | Torque tester; CMM/vernier; fixtures |
| Packaging | Protection and compliance | Bag/label parts; place documentation; pack in carton | Standardize packaging across sizes; eco‑friendly inserts where required | Packing station; shrink wrap |
Frame and clamp tolerances (budget to mid‑range)
- Frame diagonal difference across opposing corners: ≤ 0.6 mm (24″–36″), ≤ 1.0 mm (up to 48″).
- Parallelism of opposing clamp bars: ≤ 0.8 mm over length.
- Hole/locating accuracy: ±0.2 mm from fixture datum.
- Clamp closing torque: 6–8 Nm typical; verify ±10% tolerance.
- Mesh attachment surface flatness: ≤ 0.8 mm per 500 mm.
- Fastener torque: use standard sizes and common tool set to minimize cost.
Quality assurance across phases
| QA Phase | Focus | Acceptance |
|---|---|---|
| Design validation | Geometry, clamping, safety | Meets dimension specs; lock‑off verified; risk assessment completed |
| First article inspection (FAI) | Dimensional and functional | 100% check on pilot lot; retain certified inspection report |
| In‑process (fabrication) | Geometry and weld/slot quality | Diagonals within tolerance; drill depth/location per spec |
| Post‑assembly | Clamp function, pad adhesion, torque | Clamp holds ≥ X cycles at rated load; pad adhesion pull‑off minimum; torque marked |
| Environmental/shipping | Packaging robustness | Carton compression test; drop test per ISTA/ASTM standards |
Quality management and recognized standards
| Area | Standard/guideline | Application |
|---|---|---|
| Quality management | ISO 9001 | Process control, corrective/preventive actions, traceability |
| Occupational safety | OSHA (USA) | Guarding, labeling, torque tools; instruction manual includes warnings and specifications |
| Machinery safety | Machinery Directive 2006/42/EC (CE) | EU conformity; risk assessment; technical file; CE mark |
| Environmental | ISO 14001 | Powder coating and solvent use control (if applicable) |
| Adhesives/materials | Low‑VOC policies; RoHS (if applicable to electronics/controls) | Pad bonding and coatings compliance for EU market |
| Packaging | ISTA 1A/2A or ASTM D4169 (drop/compression) | Distribution robustness (USA/EU) |
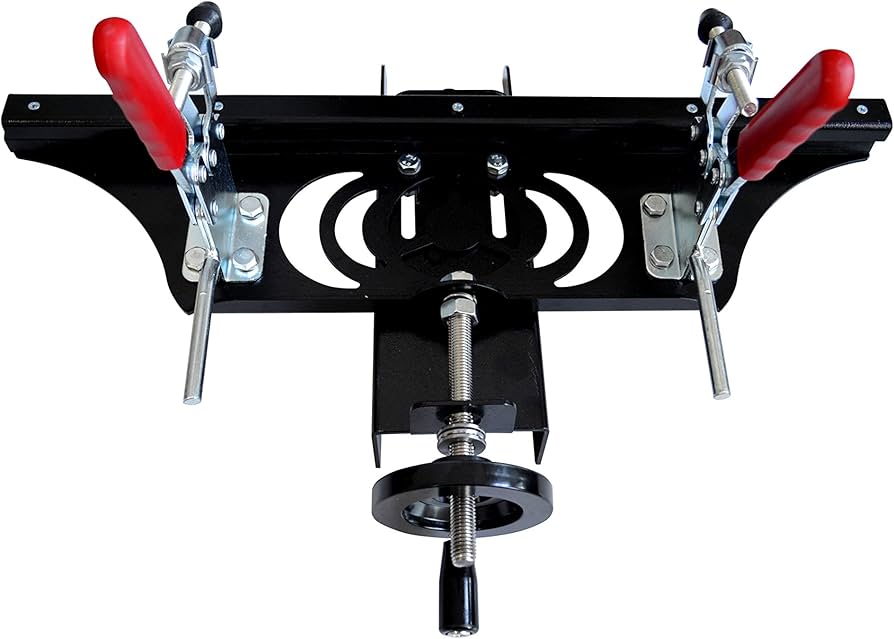
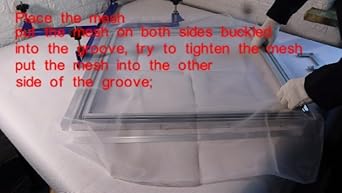
Clamp durability and mesh tension protocol
- Mesh attachment: use perimeter clamp bar with textured EPDM pad; recommended engagement ≥ 12–15 mm.
- Tension measurement: use tension meter or frequency method; set per mesh type and frame size; record for audit.
- Life testing: clamp actuation rated for 5,000 cycles minimum (budget); verify retention after test; adjust spring/material as needed.
- Safety: include pinch‑point warnings; optional guard lip on clamp cam.
Testing matrix (budget‑friendly)
| Test | Method | Acceptance | Frequency |
|---|---|---|---|
| Dimensional | Measure diagonals and bar parallelism | Per tolerance table | First lot 100%, then AQL 1.0 on each size |
| Clamp torque | Digital torque tester | Within ±10% of spec | Each lot sample (n ≥ 8) |
| Pad adhesion | Pull‑off at pad edge | ≥ 0.8 N/mm (typical) | Each lot sample (n ≥ 5) |
| Cycle durability | 5,000 clamp operations | No slippage/loosening | Pilot lot and per change |
| Shipping test | Drop and compression | No damage; fasteners intact | Each package spec revision |
Traceability and documentation
- Lot/batch coding on frame and clamp bars.
- Inspection data sheet for each size: dimensions, torque, pad adhesion, cycle test summary.
- User manual with torque spec, assembly sequence, safety warnings; CE compliance (EU) and OSHA notice (USA).
- Packaging labels include part number, size, net weight, carton dimensions.
Cost reduction without compromising QA
- Standardize frame sizes and clamp hardware across the range.
- Use fixtures and jigs to reduce operator variation and rework.
- Powder coat steel vs. paint; reduce masking operations.
- Minimize part variants; optimize cut lengths for material yield.
- Conduct batch machining; perform in‑process checks instead of full 100% post‑assembly.
- Use AQL sampling for established production lots; retain pilot 100% inspections to maintain baseline quality.
Outcome: A low‑cost but robust manual screen stretcher that meets recognized QA practices in the USA and Europe, maintains functional tolerances and safety, and provides dependable mesh clamping for screen printing.
Practical Sourcing Guide: A Step-by-Step Checklist for ‘cheap screen stretcher’
Practical Sourcing Guide: A Step-by-Step Checklist for “cheap screen stretcher”
Clarify the product before you search. “Screen stretcher” can mean:
– Screen printing: screen stretching machines for tensioning mesh, plus canvas/plier tools for mounting and adjustments.
– Consumer devices: handheld screen magnifiers for phones/tablets.
Illustrative Image (Source: Google Search)
Use the checklist below to source economically for USA and Europe procurement.
Step-by-step sourcing checklist
1) Define use-case and scope
– Choose one primary category:
– Screen printing equipment (manual stretcher machines; pliers; canvas/stretchers).
– Screen magnifiers (consumer-grade magnifier devices).
– Specify capacities, e.g., 24″ x 24″ (common for small print shops).
– Decide if “cheap” means lowest unit price, lowest landed cost (LLC), or lowest TCO (unit + freight + import + service + warranty).
2) Set target specifications and trade-offs
– Essential specs: size (e.g., 24″ x 24″), build material (e.g., stainless steel pliers), review rating, stock availability, lead time.
– Trade-offs for cost: manual vs. semi-automatic; single-size vs. adjustable; generic brand vs. minor premium for better ratings or warranty.
3) Where to source (USA and Europe)
– USA: marketplaces (Amazon), specialty print suppliers, manufacturer-direct websites, regional distributors.
– Europe: EU specialty suppliers, local distributors, Amazon EU, manufacturer-direct (check import duties/VAT).
– Compare lead times (in-stock vs. backorder), shipping terms (EXW vs. DDP for direct imports).
Illustrative Image (Source: Google Search)
4) Screen candidate products (examples from Amazon)
Use as quick reference points; confirm current details on each product page.
- Manual screen stretcher machines (screen printing)
- Option A: FOKOCALI 24″ x 24″ Manual Screen Stretching Machine
- Price: $182.99 (at time of listing)
- Delivery estimate: Dec 15–24; faster option Dec 9–11
- Stock: Only 18 left
- Positioning: “High Precise” manual machine
-
Option B: High Precise 24″ x 24″ Manual Screen Stretching Machine
- Price: $228.00
- Delivery estimate: Dec 12–19; faster Dec 9–11
- Stock: Only 13 left
- Positioning: “High Precise” manual machine
-
Adjacent tools (to pair with a stretcher)
- Heavy Duty Canvas Pliers (stainless steel, anti-corrosion)
- Price: $15.89
- Delivery estimate: Dec 7 (fastest Dec 4)
- Rating: 4.4/5 (229 reviews); 300+ bought in past month
- Notes: Useful for tightening/adjustments; strong demand indicator
-
U.S. Art Supply Canvas Stretcher Pliers
- Price: $16.99
- Rating: 4.2/5 (506 reviews); 100+ bought in past month
- Notes: Mid-range priced pliers with broad adoption
-
Screen magnifier (consumer category; not screen printing)
- 12″ Screen Magnifier (Silver)
- Price: $25.99
- Rating: 5/5 (2 reviews)
- Delivery: Dec 7; fastest Dec 4
- Notes: Not a printing stretcher; included for definition clarity only
Use these references to benchmark price, ratings, and lead times.
5) Build a quick cost and risk model (for each candidate)
– Unit price (current offer)
– Shipping cost and estimate (standard vs. fastest)
– Stock risk (e.g., “Only X left”—sourcing urgency)
– Rating trend (number of reviews; recency; demand signals like “bought in past month”)
– Total landed cost (TLC): Unit + shipping + import duties/VAT + handling
– Return policy and warranty (affects true cost of “cheap”)
6) Validate supplier credibility
– Check on-page ratings, review counts, and recent sales (“bought in past month”).
– Confirm delivery windows and stock status.
– Look for “Amazon’s Choice” or comparable badges to gauge demand/return rates (if shopping on Amazon).
Illustrative Image (Source: Google Search)
7) Place a test order and validate fit
– Order the lowest-risk candidate first: in-stock item, adequate ratings, reasonable delivery.
– Confirm it meets your physical requirements (size, compatibility with existing equipment).
– Evaluate build quality and operational performance before larger commitments.
8) Scale or switch based on results
– If performance is satisfactory, consider bulk orders or subscription-based reorders to reduce unit costs.
– If not, pivot to the next best option from your shortlist (balance cost vs. quality and reliability).
Quick comparison (manual screen stretcher machines)
| Product | Price (USD) | Delivery window | Stock status | Positioning |
|---|---|---|---|---|
| FOKOCALI 24″ x 24″ Manual Screen Stretching Machine | $182.99 | Dec 15–24 (fastest Dec 9–11) | Only 18 left | “High Precise” manual |
| High Precise 24″ x 24″ Manual Screen Stretching Machine | $228.00 | Dec 12–19 (fastest Dec 9–11) | Only 13 left | “High Precise” manual |
Note: Delivery dates and prices vary; confirm current details on each product page.
Decision guide for “cheap screen stretcher”
- Choose 24″ x 24″ manual stretcher machines for small print shops aiming to control cost.
- If price is the only driver, the FOKOCALI option is lower priced but with limited stock. The High Precise option is higher priced but may be preferred if build confidence and availability matter more than the price delta.
- Add reliable pliers (e.g., Heavy Duty Canvas Pliers at $15.89) to tighten/adjust frames and reduce reliance on the stretcher alone.
Use the checklist and the comparison to secure a cost-effective, fit-for-purpose solution in the USA and Europe, minimizing risk while maintaining practical procurement speed.
Illustrative Image (Source: Google Search)
Comprehensive Cost and Pricing Analysis for cheap screen stretcher Sourcing
Comprehensive Cost and Pricing Analysis for Cheap Screen Stretcher Sourcing
Market price context (Amazon snapshot)
Use these observed price points to anchor your pricing corridor and target margins.
| Category | Example item (Amazon) | Listed price (USD) | Notes |
|---|---|---|---|
| Mobile screen magnifier (budget) | 10″ 3D HD magnifier | $21.88 | Consumer-grade magnifier, foldable |
| Mobile screen magnifier (mid) | 12″ 3D HD magnifier (silver) | $25.99 | Slightly larger, similar specs |
| Manual screen stretching machine (budget) | 24″x24″ (mid) | $182.99 | Manual stretcher, limited stock |
| Manual screen stretching machine (higher) | 24″x24″ | $228.00 | Heavier duty positioning |
Prices vary by size, materials, shipping method, and seller. Expect low-cost manual stretchers in the $180–$230 band on consumer marketplaces, depending on steel construction and accessories.
Target audience needs and B2B segmentation
- Small print shops: Manual stretching machines in the $180–$230 per unit range; target delivered cost around 40–55% of SRP for a 45–60% margin.
- Screen magnifier resellers: Consumer-grade magnifiers in the $22–$26 retail band; target landed cost 35–45% of SRP to allow room for platform fees and ad spend.
- Industrial buyers: Semi-automated stretchers with sturdier frames, longer lead times, higher MOQs, and margins closer to 35–45% SRP.
Cost framework for B2B sourcing
| Component | Breakdown | Typical levers |
|---|---|---|
| Materials | Plastics (ABS, PMMA, PS), aluminum frames, stainless pliers, packaging (FOBEXW) | Material choice, thickness, supplier tier, resin price volatility, packaging design |
| Labor/Overhead | Assembly labor, QC, sampling, set-up, factory overhead | MOQ, batch consolidation, automation level, production efficiency |
| Tooling & Amortization | Injection molds, fixtures, jigs; die cuts for packaging | Amortization schedule by volume; multi-cavity molds |
| Logistics (to USA/EU) | International freight, customs, last-mile | Mode (air/sea/truck), packing density, Incoterms (DDP vs. FOB/CIP) |
| Risk/Compliance | Tariffs, duties, taxes, returns allowance, packaging compliance | HS code mapping, origin rules, testing/certification needs |
Category-specific cost drivers
Mobile screen magnifier (consumer)
– Materials: PMMA lens (thicker and clearer costs more), ABS housing, metal hinges, silicone pads; retail packaging.
– Labor: Assembly and QC steps; manual hinge alignment; SKU variants (color/size) drive set-up time.
– Logistics: High volumetric weight; air vs sea trade-offs on lead time and damage risk.
Manual screen stretching machine (B2B)
– Materials: Carbon steel/stainless steel frame, clamps, threaded rods, tensioning hardware; heavier packaging for freight class 70–100+.
– Labor: Welding/finishing, assembly, load testing; QC for frame straightness and clamp retention.
– Logistics: Dimensional weight; truck freight dominates for domestic USA/EU distribution; export crates for ocean.
Illustrative Image (Source: Google Search)
Indicative unit cost build-up (illustrative)
1) 12″ mobile screen magnifier (retail ~$25.99)
– Materials: $5.3–$6.8
– Labor/assembly/overhead: $0.45–$0.9
– Tooling amortization (injection mold): $0.07–$0.15 at 3k–10k units
– Packaging: $0.6–$0.9
– EXW ex-factory cost: ~$6.4–$8.8
– Freight to USA (air): $3.0–$5.0 per unit
– Freight to USA (sea, 1cbm ≈ 60–70 units): ~$0.20–$0.35 per unit
– Duties/fees: 0–6.25% on most consumer electronics/housings; check HS 9001.x or 8517.x with your broker
– Landed cost target for $25.99 SRP (aim 50% margin): $9–$12
2) 24″x24″ manual screen stretching machine (retail ~$182.99–$228)
– Materials/frame/hardware: $85–$115
– Labor/assembly: $10–$16
– Tooling/fixtures: $2–$6
– Packaging: $4–$8
– EXW ex-factory cost: ~$101–$145
– Freight (sea LCL to port + truck): $20–$45 per unit depending on crate volume
– Duties/fees (based on HS 8479.x): 2.5% (USA), varies by EU member (often ~2–4%–check TARIC)
– Landed cost target for $199 SRP (aim 50% margin): $95–$105; confirm freight class to avoid cost shocks
Price bands by order size and lead time
- 1–10 units (spot retail): ExW unit price high; freight dominates per unit
- 50–200 units: Negotiate tooling amortization; ex-factory cost stabilized; choose air or truck freight to meet launch dates
- 500–1,000 units: Move to FOB/CIP; consider sea/air freight mix; tighten QC/audit frequency
- 3k–10k units (consumer) / 300–1,000 units (manual): Optimize molds/cavities; negotiate packaging tiers; commit to 60–90 day purchase orders for best exW pricing
Logistics cost and lead time snapshot (China to USA/EU)
- Air freight (express → pallet): 3–7 days transit; high cost per cbm (use only for launch/urgent replenishments)
- Sea freight (port-to-port): 18–35 days; reliable for routine replenishments
- DDP (Delivered Duty Paid) vs. FOB/CIP: DDP simplifies landed costing but caps freight negotiation; FOB/CIP offers more control and sometimes lower cost if you own freight
| Category | Packaging method | Freight mode | Likely lead time | Per-unit freight (illustrative) |
|---|---|---|---|---|
| Screen magnifier | Retail box in carton | Air | 3–7 days | $3.0–$5.0 |
| Screen magnifier | Cartons on pallet | Sea LCL | 18–35 days | $0.20–$0.35 |
| Manual stretcher | Crate or pallet | Truck (domestic USA/EU) | 3–10 days | $20–$45 (by route) |
Rates vary with season and spot market; quote monthly and track surcharge clauses.
Incoterms and payment
- Preferred for early-stage B2B pilots: EXW or FOB; move to DDP once freight is stable and volumes predictable
- Payment: 30% deposit + 70% before shipment; for larger orders, consider a structured schedule with partial shipments; consider trade insurance on net terms
Tariffs, duties, and VAT mapping (indicative)
| Product | HS code (likely) | USA duty | EU VAT note |
|---|---|---|---|
| Screen magnifier | 9001.x or 8517.x | 0–6.25% typical | VAT varies by member; collect import VAT at border |
| Manual stretching machine | 8479.x | 2.5% | VAT varies; check TARIC per member state |
Use customs brokers to confirm classification and apply origin rules (FTA eligibility).
Illustrative Image (Source: Google Search)
Tips to reduce cost without compromising quality
- Engineering and BOM
- Standardize materials and thicknesses; choose PS/ABS where PMMA is overkill; specify clear but thinner PMMA only where optical performance requires it.
- Reduce fasteners; use retained pins or integral snap fits; avoid hidden hardware that adds assembly time.
-
Combine SKUs where possible (one carton design for multiple sizes).
-
Tooling and manufacturing
- Share molds across SKUs to amortize cost faster; push for 2-cavity or 4-cavity molds at 3k+ units/month.
- Negotiate tooling amortization and free-of-charge rework on pilot runs; set clear acceptance criteria for the first batch.
-
Insist on PPAP-lite or AQL sampling for the first production run; lock in in-line QC checks (hinge alignment, lens retention).
-
Packaging and density
- Reduce box size and improve carton cube; pack magnifiers face-to-face to prevent lens rub; use edge guards.
-
For manual stretchers, design crating to avoid freight class penalties; use skids and corner protectors.
-
Logistics
- Blend freight modes: launch by air for fast-turn SKUs, then switch to sea for replenishment.
- Ship full containers when volumes allow; consolidate shipments to USA and EU hubs.
-
Consider 3PLs with cross-docking to reduce last-mile costs; negotiate trucking lanes.
-
Pricing and margins
- Set target landed costs at 40–55% SRP for high-velocity SKUs; leave headroom for platform fees (e.g., Amazon FBA) and advertising spend.
- Build a price floor: margin + variable freight + returns/chargebacks; raise MOQs and volume commitments to earn better exW pricing.
Pricing calculator (use it to set targets)
- EXW ex-factory cost = Materials + Labor + Overhead + Tooling amort
- Landed cost (DDP) = EXW + International freight + Insurance + Duties/fees + Domestic delivery
- SRP recommendation (B2B retail) = Landed cost ÷ (1 − target gross margin)
- Example for magnifier: Landed $10.80 ÷ (1 − 0.50) = $21.60 target SRP (fits under $25.99 consumer band while preserving margin)
- Example for manual stretcher: Landed $100 ÷ (1 − 0.50) = $200 target SRP (in line with observed $182.99–$228)
Account for returns/warranty allowances by lifting target margins or adding line-item reserves.
Risk management and quality gates
- Material index volatility: Resin and steel prices shift quarterly; include price indexation clauses in PO terms.
- Quality: AQL 1.5 for consumer batches; functional checks (hinge cycle life, clamp tension for stretchers) and cosmetic criteria set per SKU.
- Inventory: Safety stock of 2–4 weeks on fast movers; use sea freight cycles to align replenishment.
Conclusion
Anchor your quoting and margin strategy to the observed market bands:
– Screen magnifiers: $22–$26 retail (aim 40–55% margin, with landed cost ≤$10–$13 depending on freight)
– Manual screen stretchers: $180–$230 retail (aim 50% margin, with landed cost ≤$100–$110 depending on domestic freight class)
Control costs through disciplined BOM choices, shared tooling, smarter packaging, and freight mode blending. Lock in consistent terms (Incoterms, payment schedules) and maintain tight QC with defined AQL targets to protect margins while delivering reliable “cheap” screen stretchers at scale.
Alternatives Analysis: Comparing cheap screen stretcher With Other Solutions
Alternatives Analysis: Comparing Cheap Screen Stretcher With Other Solutions
Definition in this guide: “cheap screen stretcher” refers to low-cost, entry-level manual screen printing stretchers priced under $250. It does not include handheld canvas pliers or phone screen magnifiers.
Illustrative Image (Source: Google Search)
Summary and recommendation
- For small-format shops testing the market or running intermittent jobs: a “cheap” 24×24 manual stretcher is the lowest-capex entry point. It keeps overhead flexible and is sufficient for prototyping or low-volume lines.
- For steady small/medium runs with tighter registration: the FOKOCALI 24×24 ($182.99) is the better buy. It is modestly priced yet delivers consistent mesh tension with fewer returns risk (stock level noted).
- For high-throughput and tight registration: upgrade to an automatic or pneumatic stretcher when your volume justifies the spend.
Comparison table
| Criterion | Budget “Cheap” Stretcher (≈$228–$229) | Alternative 1: FOKOCALI 24×24 Manual ($182.99) | Alternative 2: Automatic/Pneumatic Stretcher |
|---|---|---|---|
| Capex (approx) | ~$228–$229 | ~$182.99 | Typically $3k–$6k+ |
| Format | 24×24 in (typical) | 24×24 in (confirmed) | 24–60+ in (varies) |
| Labor intensity | Moderate–High (manual clamping and hand-tightening) | Moderate (manual but more consistent clamp behavior) | Low (mechanized tensioning) |
| Mesh tension consistency | Variable; depends on operator and clamp quality | Better; machine geometry and stock status indicate steadier usage | High; stable, repeatable tensioning |
| Setup changeover | Manual clamps enable quick changeovers across small runs | Manual clamps enable quick changeovers; slightly smoother clamp movement | Fast with alignment systems; often integrated |
| Maintenance | Minimal; inspect clamps and frame guides for wear | Minimal; inspect clamps; keep linkages clean | Higher; maintenance of pneumatic/automation systems |
| Warranty | Varies by seller | Varies by seller | Vendor-specific; commonly more formal coverage |
| Supplier risk | Popular items at top-end of budget have good turnover | “Only 18 left in stock” suggests demand; monitor replenishment | Longer lead times; schedule maintenance contracts early |
| Risk to print quality | Moderate; can meet basic quality with careful setup | Lower; better stability reduces print defects | Low; consistent tension improves registration and halftones |
| Best fit | Prototyping, low-volume, budget-constrained shops | Steady small/medium runs, tighter registration | High-volume, high-mix, premium quality programs |
Notes:
– Pricing and stock details sourced from marketplace listings for 24×24 manual stretchers.
– Automatic stretcher pricing is indicative and varies by brand and features.
Analysis by alternative
Budget “Cheap” Stretcher (≈$228–$229)
– Strengths: Minimal capital outlay; suitable for pilot runs, shops validating demand, or job shops with irregular screen volumes; fast to deploy and easy to resell if needed.
– Trade-offs: Mesh tension consistency depends heavily on operator technique; clamp quality varies; occasional manual tightening adjustments may be needed during long runs.
– When to choose: Low-volume or experimentation stages; small-format work where occasional minor registration inconsistencies are acceptable.
Alternative 1: FOKOCALI 24×24 Manual ($182.99)
– Strengths: Lower price than the “cheap” option with similar format; stock status (18 left) suggests current demand and availability; clamps and machine geometry favor repeatable tensioning without automation overhead.
– Trade-offs: Still manual; training and SOPs are required to maintain uniform tension across operators.
– When to choose: Medium volume in smaller formats; shops that value cost discipline yet need tighter registration than entry-level stretchers typically provide.
Alternative 2: Automatic/Pneumatic Stretcher
– Strengths: Consistent mesh tension with minimal operator variance; improved registration; faster changeovers in production lines; better support for halftones and fine detail.
– Trade-offs: Higher capex; longer lead times; maintenance complexity for pneumatic components; requires training on safety and calibration routines.
– When to choose: High-throughput programs; premium quality requirements; multi-shift operations where repeatability and labor efficiency drive ROI.
Illustrative Image (Source: Google Search)
Bottom line
- A “cheap” manual stretcher is a sensible entry point for experimentation and low-volume work.
- The FOKOCALI 24×24 manual stretcher delivers better consistency and lower cost than many budget units, making it the recommended choice for small/medium runs.
- Move to an automatic stretcher when throughput and quality standards demand repeatability that manual clamping cannot reliably sustain.
Essential Technical Properties and Trade Terminology for cheap screen stretcher
Essential Technical Properties and Trade Terminology for “Cheap” Screen Stretchers
“Cheap” in B2B context means cost-effective: low purchase price with acceptable performance and serviceability. For budget manual screen stretching machines (commonly 24×24 in), buyers should balance essential properties against price, lead time, and trade terms.
Core Technical Properties to Vet
- Working area (open frame size): e.g., 24×24 in. Determines max screen size you can stretch.
- Clamping method: corner clamps or perimeter clamps. Corner clamps are cheaper, faster to set, and adequate for many general print jobs; perimeter clamps offer more uniform pressure on large formats.
- Mesh tension capability: measured in N/cm or N/in. Low-cost units typically provide lower, less consistent tension. Ask for target and achievable ranges and tolerance (±).
- Frame compatibility: maximum bar thickness, corner radius, and whether frames are wood or aluminum. Confirm clamp jaws accommodate typical thickness without slipping.
- Precision and repeatability: parallelism of clamps, squareness, and ability to achieve consistent mesh tension across the frame. Cheaper machines often have looser tolerances.
- Mechanical actuation: manual crank/lever vs. integrated turnbuckles. Integrated turnbuckles simplify per-corner adjustment but may not be standard on “cheap” models.
- Build quality: aluminum vs. steel construction, powder coat finish, hardware grade, and presence of springs/locks to reduce slip under tension.
- Safety and stability: base footprint, weight, anti-slip feet, and lock-down mechanisms.
- Serviceability: availability of spare parts (clamps, screws, springs), standard fasteners, and maintenance-friendly design.
- Dimensions/weight/shipping class: package size and freight class for accurate landed cost.
- Country of origin and compliance: e.g., CE marking (EU), where applicable.
Sample Budget Machines from Market Scan
| Model (from market scan) | Working area | Price | Clamping method | Claimed precision | Construction | Weight (shipped) | Notes |
|---|---|---|---|---|---|---|---|
| High Precise 24×24 in Manual Screen Stretching Machine | 24×24 in | $228.00 | Corner clamps (manual actuation) | “High Precise” (qualitative) | Steel/aluminum, powder coat | Not stated | Often purchased for entry-level to mid-volume stretching. |
| FOKOCALI 24×24 in Manual Screen Stretching Machine | 24×24 in | $182.99 | Corner clamps (manual actuation) | Not specified | Steel/aluminum | Not stated | Low price; confirm mesh tension capability and spare parts. |
Note: Some products marketed as “screen magnifiers” or canvas stretchers are not screen printing screen stretchers. Verify that items are true screen printing stretcher machines before procurement.
Trade Terminology Cheat Sheet
| Term | What it means | Why it matters for “cheap” stretchers |
|---|---|---|
| MOQ (Minimum Order Quantity) | Smallest order volume a supplier accepts | Cheap SKUs may have higher MOQs; negotiate mixed SKUs or small trial orders. |
| OEM (Original Equipment Manufacturer) | Your brand on the product, supplied by the factory | Useful for private label; expect setup fees, MOQs, and design review on cheap tiers. |
| ODM (Original Design Manufacturer) | Supplier designs and manufactures to spec | Faster to market than OEM; may still have limited customization at low price. |
| Customization (logo, color, packaging) | Private label options | Common entry-tier options; confirm print area and packaging compatibility. |
| Lead Time (production + packing) | Time from PO to ready-to-ship | Budget units may have longer or variable lead times; confirm buffers. |
| Payment Terms | e.g., T/T, L/C, PayPal, installment | Typical B2B: T/T 30/70 or 50/50; smaller orders may be prepayment or platform escrow. |
| Incoterms | Shipping responsibility (EXW, FOB, CIF, DDP) | Clarify freight and duties; DDP simplifies EU/USA imports but costs more. |
| Freight Class (USA) | NMFC category used for trucking quotes | Affects shipping cost; check dimensional weight and palletization. |
| ETA (Estimated Time of Arrival) | Forecasted delivery date | Include customs clearance; confirm HS code and documentation. |
| HS Code | Harmonized System code for import | Ensures correct duty and customs processing. |
| Certifications | e.g., CE (EU), RoHS | Required in EU; verify if machinery itself applies or only electronics/packaging. |
| QA/QC and Rework | Testing and returns handling | Standard for cheap SKUs: confirm sampling rates and correction policies. |
| Warranty & After-sales | Coverage period and terms | Ask for explicit term (e.g., 6–12 months) and spares availability. |
Practical Procurement Guidance for USA and Europe
- Anchor specs around a standard working area (e.g., 24×24 in) to reduce cost and lead time.
- Prioritize corner-clamp manual machines for low-cost needs; verify clamp jaw range and anti-slip design.
- Request target mesh tension ranges and tolerance. If unavailable, run a sample job and inspect mesh sag and registration.
- Negotiate MOQ and payment terms; platform escrow can be a fallback for smaller orders.
- For EU buyers, confirm CE requirements and duties; for USA buyers, confirm freight class and HS code early to avoid landed-cost surprises.
- Keep a small spare parts kit (clamps, springs, fasteners) to reduce downtime on budget machines.
This balanced approach lets you procure a cost-effective “cheap” screen stretcher that meets your shop’s core needs without compromising serviceability or import predictability.
Navigating Market Dynamics and Sourcing Trends in the cheap screen stretcher Sector
Navigating Market Dynamics and Sourcing Trends in the Cheap Screen Stretcher Sector
Quick definition: “cheap” in this context means low unit price at modest spec—commonly 12–24 in manual stretchers and basic tools. Premium stretchers with CNC control, precision jigs, or integrated tensioning systems fall outside this segment’s pricing envelope.
Illustrative Image (Source: Google Search)
A brief history, relevant to today’s cheap segment
- 1980s–1990s: Hand-driven, bulky frames dominate. Tensioning is inconsistent; quality hinges on craft.
- Early 2000s: Modular presses and simplified tooling standardize small formats. DIY shops favor 12–20 in frames.
- 2010s: Standardization increases; CNC becomes common in higher-end equipment; cheap manual stretchers remain prevalent due to low capex and repairability.
- 2020s: E-commerce reshapes search terms and cross-category overlaps (e.g., “screen magnifier” vs. screen printing stretcher), confusing buyers and inflating CPCs for certain keywords.
Implication: The cheap segment benefits from that earlier standardization while avoiding capital-intensive tooling, sustaining a market of sub-$300 manual machines and sub-$20 basic tools.
Price anchors from current marketplace data
Using Amazon’s “screen stretcher” result set as a directional reference:
| Subcategory | Example SKUs (from data) | Price | Lead time (US) | Rating |
|---|---|---|---|---|
| Basic 24×24 in manual machine | High Precise 24×24 in | $228.00 | Dec 12–19; 13 left | 4.8 |
| Budget 24×24 in manual machine | FOKOCALI 24×24 in | $182.99 | Dec 15–24; 18 left | — |
| Screen magnifier (consumer) | 10 in magnifier | $21.88 | Dec 24, 2025–Jan 26, 2026 | 2.5 |
| Screen magnifier (consumer) | 12 in magnifier | $25.99 | Dec 4–7 | 5.0 |
| Canvas stretching pliers (art tool) | U.S. Art Supply 2 3/8 in | $16.99 | Not listed | 4.2 |
Key takeaways:
– Sub-$200 machines exist; stock is limited and lead times are variable.
– Keyword overlap with consumer magnifiers and art tools drives price signal noise.
– Shipping lead times are meaningful for planning and should be modeled into safety stock.
Market dynamics shaping the cheap segment
- Category noise: “screen stretcher” clusters magnifiers, canvas stretchers/pliers, and screen printing machines. Clear specs (max frame size, method, mesh included) reduce selection time.
- Supplier density: The supplier base is fragmented. Many factories operate small lines producing both frames and tooling, favoring quick-turn low-MOQ runs.
- Specification spread: Cheap machines still vary by precision, clamping method, and accessory compatibility. Buyers must prioritize.
- Supply volatility: Spot prices for metals and freight are volatile, while packaging inflation remains sticky. This affects total landed cost more than unit price.
- Regulatory awareness: Even low-cost products must comply with heavy metals limits, coatings, and ECHA/TSCA restrictions in EU/US.
Sustainability in a low-cost model
- Materials and coatings
- Prefer aluminum and steel with recycled content; specify low-VOC coatings and RoHS/REACH-compliant finishes.
- Avoid hazardous finishes (e.g., chromates). Confirm TSCA/HIMI where applicable for wood components.
- Packaging
- Minimal, recyclable materials; avoid foam where possible. Flat-pack designs reduce volume and freight emissions.
- Traceability
- Require material declarations (e.g., RoHS, REACH SVHC) and country of origin.
- End-of-life
- Design frames for disassembly and reuse of components (e.g., replaceable clamps, bars).
- Supplier alignment
- Small MOQs can yield better scrap utilization. Standardize sizes to lower waste and transport cost per unit.
Sourcing landscape for US/EU buyers
- Direct from factory vs. distributor
- Direct: Better price, lower MOQ, higher compliance overhead, variable lead times.
- Distributor: Faster delivery and lower procurement friction, but higher landed cost.
- Lead time drivers
- Raw materials and component availability (e.g., quick-release clamps, springs).
- Shipping method and volume (LTL vs. FTL; containerization).
- Holiday seasonality (CNY, EU summer closures).
- Cost elements beyond unit price
| Cost component | How it impacts cheap stretchers |
|---|---|
| Freight (sea/air/truck) | Often outweighs unit cost savings for low-priced items. Consolidation and flat packaging help. |
| Packaging | Bubble wrap, foam inserts, and oversized cartons can inflate freight and damage rates. |
| Tariffs/duties | HS classification affects duty. Validate early to avoid surprises. |
| Lead time variability | Requires buffer stock; impacts cash flow and project timelines. |
| Warranty/returns | Cheap implies higher failure risk. Include replacement terms in contracts. |
- Regional nuances
- US: Strong preference for reliable delivery, standardized sizes, and documented compliance. Customs-bonded shipments simplify clearance.
- EU: REACH compliance is critical; stricter packaging and WEEE considerations may apply to electrical accessories (rare in manual stretchers).
Risk management for buyers
- Avoid category misclassification
- Screen magnifier vs. screen printing stretcher; separate SKUs and data sheets.
- MOQ and quality controls
- Define inspection criteria: frame squareness (diagonal difference), surface flatness, tension uniformity.
- Use AQL sampling and accept small deviations only if they don’t affect screen adhesion/registration.
- Warranty and service
- Specify a warranty (12 months recommended for frames), spare parts availability (e.g., screws, washers), and returns processing.
- Logistics planning
- Favor flat-pack; pack efficiently; account for containerization windows; choose incoterms wisely (EXW vs. FOB/DDP).
Practical sourcing framework
- Step 1: Define needs
- Max frame size (e.g., 24×24 in), manual vs. auto-tension, surface precision, accessories included.
- Step 2: Filter suppliers
- Focus on those with consistent 12–24 in output, documented compliance (RoHS/REACH/TSCA), and export experience to US/EU.
- Step 3: Quote validation
- Compare unit, freight, packaging, and warranty. Compute landed cost per unit.
- Step 4: Pilot order
- Test dimensional accuracy, clamping robustness, and finish durability.
- Step 5: Scale with guardrails
- Lock lead times with buffers; standardize packaging; track performance KPIs (on-time, damage rate, defect rate).
Supplier and marketplace checks
Using the available Amazon results as a directional benchmark:
– 24×24 in manual stretchers: Pricing spans approximately $183–$228 with limited stock and varying lead times.
– Basic tools/pliers: Priced at $15–$17 with stable ratings (4.2–4.8), signaling mature supply.
– Category noise: Magnifiers appear under “screen stretcher,” underscoring the need for precise search filters and spec documentation.

Illustrative Image (Source: Google Search)
A note on regulation and tariffs
- EU: Confirm RoHS compliance (heavy metals in coatings), REACH SVHC statements, and safe handling notes for packaging adhesives.
- US: TSCA applies to certain chemical substances; some metals may require declarations. Tariffs depend on HS code classification—validate before quotation.
- Customs: Harmonize packaging labeling and HS codes to reduce delays and demurrage.
In sum: The cheap screen stretcher segment is dominated by manual, 12–24 in machines and basic tools, with pricing anchored around $183–$228 for 24×24 in machines on one large marketplace. Sourcing success hinges on precise category filtering, quality controls, sustainable materials, and disciplined landed-cost modeling across US and EU channels.
Frequently Asked Questions (FAQs) for B2B Buyers of cheap screen stretcher
Frequently Asked Questions (FAQs) for B2B Buyers of Cheap Screen Stretcher
1) What counts as “cheap” in the screen stretcher category?
“Cheap” here means economy-class manual screen stretchers for 24×24 in (≈610×610 mm). Expect:
– Basic clamp frames, single-size clamps, and hand-crank pullers.
– No tension meter or digital controls.
– Typical new-unit prices around $180–$230 on mainstream US/EU marketplaces for 24×24 in machines (e.g., $182.99 to $228.00), excluding freight. Ancillary items like canvas pliers may be priced in the low double digits (≈$15–$17).
2) What should a buyer check before purchasing a low-cost stretcher?
Focus on operational fit and durability over “features you won’t use.” Confirm:
– Frame compatibility: max frame size and clamp type.
– Worktable/stand: stable base, height range, and footprint.
– Mechanism: manual crank vs. geared pull; gear quality and rust resistance.
– Tolerances and parallelism: square clamps and repeatability for registration.
– Spares availability: replacement clamps, crank handles, and wear parts.
– Warranty/returns: coverage length and process; lead times and in-stock status.
– Documentation: basic assembly guide and safety notes.
3) Which mesh counts and inks work with economy stretchers?
Cheap manual stretchers suit general-purpose screen printing where ultra-precision is not critical:
– Typical mesh range: 110–305 (43–120 threads per inch).
– Ink compatibility: water-based and plastisol as commonly used in apparel, signage, and general industrial print. Verify with your ink supplier for mesh/channeling recommendations.
Illustrative Image (Source: Google Search)
4) How does “cheap” affect screen quality and consistency?
Expect trade-offs versus mid/high-end equipment:
– Lower repeatability: more operator-dependent tensioning; potential diagonal skew.
– Fewer size options: often limited to a single frame size or narrow size range.
– Slower changeovers: manual mechanisms and fewer quick-change clamps.
– Durability: simpler construction may require more frequent inspection and maintenance.
– Tip: adopt SOPs (e.g., corner sequence, visual tension checks) and periodically inspect for clamp wear or gear slop to maintain acceptable quality.
5) Manual vs. pneumatic/electric: what’s the minimum viable setup?
Use the following decision logic:
– Low volume, budget-first, small formats: manual 24×24 in is acceptable; add a basic tension indicator if available.
– Medium volume, multi-size production, or tighter tolerances: consider upfit to mid-tier (sturdier frame clamps, repeatable gear, optional tension meter) or pneumatic/electric systems.
– Upgrades: replacement clamps, better pullers, or adding a simple tension indicator can improve results on a cheap frame stretcher.
6) What is the realistic price range for economy 24×24 in stretchers?
Indicative retail pricing for 24×24 in manual screen stretchers in the US/EU market is roughly $180–$230, with occasional lower/high outliers:
– Example (24×24 in, manual): $182.99–$228.00, with limited in-stock (≈13–18 units) at times.
– Freight can add ≈$45 (example listing), and lead times often show multi-day windows (e.g., Dec 9–11, Dec 12–19). Confirm availability before placing a larger order.
7) Sourcing options: marketplace vs. direct from manufacturer?
Common options:
– Marketplaces (e.g., Amazon-like retailers): fastest for small orders; clear stock counts; predictable retail returns. Freight and lead times typically displayed per listing.
– Direct from manufacturer/OEM: best for bulk orders (pallets/containers) and multi-size fleets; custom branding; potential long lead times and larger MOQs.
– Due diligence: verify compliance (e.g., CE marking as applicable), warranty terms, and whether the unit is designed for screen-print frames or other stretcher types (canvas/photo).

Illustrative Image (Source: Google Search)
8) What hidden costs and risks should B2B buyers plan for?
- Freight: often 10–30% of unit cost on economy models; check dimensional weight and delivery windows.
- Re-screening waste: poor clamp alignment increases scrap rates; budget for 5–15% re-makes depending on operator skill.
- Warranty gaps: short coverage or return-only policies; consider spares kits to reduce downtime.
- Import duties/VAT: cross-border purchases may incur duties/VAT depending on Incoterms and destination country.
- Compliance: ensure basic CE/UKCA where applicable for safety; confirm product is meant for screen-print frames (some listings may be canvas or magnifier accessories).
Note on context: Pricing and availability examples above reflect typical marketplace listings for manual 24×24 in screen stretchers observed in US/EU channels; actual prices, stock, and lead times vary by vendor and date.
Strategic Sourcing Conclusion and Outlook for cheap screen stretcher
Strategic Sourcing Conclusion and Outlook for cheap screen stretcher
Cheap screen stretchers, especially entry-level manual machines, offer a pragmatic entry point for USA and Europe buyers needing basic production capability without capital intensity. From Amazon.com, common 24×24″ units range around $182.99–$228.00 with delivery in 4–14 days in the US; limited stock and carrier-related lead times dominate. Buyers can complement stretchers with low-cost accessories: canvas pliers are available at $15.89–$16.99, and 16×20″ wooden stretcher bars at $13.98. This combination underpins total cost-of-ownership (TCO) as a function of throughput, quality standards, and maintenance.
Key takeaways
– Use Amazon US for speed and predictable delivery; leverage in-stock listings and Prime-eligible sellers to mitigate lead-time variability.
– For Europe, expect longer and less consistent cross-border delivery; plan buffer inventory and consider duty/VAT compliance.
– Monitor seller feedback and stock levels; limited quantities (e.g., 13–18 units) signal procurement risk.
– Align screen stretcher selection with quality and volume: cheap manual stretchers fit low/medium volumes and standard jobs; for precision, repeatability, or high volumes, evaluate higher-spec machines.
Indicative pricing and lead times (US)
– Manual 24×24″ stretchers: $182.99–$228.00; typically 4–14 days; stock can be limited.
– Accessories: pliers $15.89–$16.99; stretcher bars $13.98; generally in stock; 1–7 days.
Illustrative Image (Source: Google Search)
Outlook (6–12 months)
– Supply remains stable with episodic stock-outs; short lead times persist in the US, while Europe may face variability due to shipping and customs.
– Prices are likely to hold steady, with small movements tied to shipping and currency fluctuations.
– EU buyers should track duty/VAT and returns processes; US buyers can optimize returns via Amazon’s policies.
– Maintain a dual-source strategy (primary and backup vendor) to hedge against stock-outs; use simple inventory buffers for high-demand sizes.
Important Disclaimer & Terms of Use
⚠️ Important Disclaimer
The information provided is for informational purposes only. B2B buyers must conduct their own due diligence.